Tuesday, August 11, 2015

Fun Times Quick Card!

Hope you're having a super awesome week so far! I'm posting over at the Scrapendipity Way Of Life blog today and wanted to share this cute and quick card to make. I love making detailed cards with technique driven backgrounds, but sometimes I just need something quick!

I cut a piece of the pool coloured polkadot paper to fit on my card front (it's actually from an American Crafts Christmas collection - Jolly!) and used a border punch to punch one edge before layering it on my card over a light pink strip. Then, I used a frame from the Maggie Holmes collection of diecuts to layer over an ice cream journalling card from a Dear Lizzy paper pack. It came with a sheet of cut apart journaling cards on a 12x12 page. I used a sentiment from a paper pack as well and added a couple enamel dots and that was that!


There are so many paper packs that come with journaling cards in them now - it's easy to find ones to add to a card! A little layering and you've got a pretty card ready in minutes!


Thanks for joining me today! Hope you have a wonderful week!


Wednesday, August 5, 2015

Pretty Cute Stamps August 2015 New Release Blog Hop!

Thanks so much for joining us for the  2015  Release Blog Hop, where we are all sharing projects featuring the new stamps this month that are now available in the Pretty Cute Stamps Store.


If you came from the Pretty Cute Stamps blog, you are in the right place. If you just stumbled across this post and would like to start from the beginning, please visit the Pretty Cute Stamps Blog

For my project for the hop, I've used the Botday stamp set to create a sweet girly robot card. I just picked up a Maggie Holmes Crate Paper 6x6 pad and it inspired me to do a pink themed card using this absolutely cute girl robot! I just love all the gears included in this set and I stamped them in gray ink to create a border for my card.


I stamped this cutie on white cardstock and used Prismacolor alcohol markers to colour her in before giving her a paper pieced dress. One of the reasons I love 6x6 pads is that the patterns are made smaller and I just love the look of them when I paper piece them :) I love this sentiment and the font - so fun!!

And how cute are these other sentiments?! Perfect for piecing together any saying!

Here's a pic of the stamp set and all the goodness included! I can't wait to use this little wind up mechanism to create a wind-up toy card! And, I know this balloon is going to be awesome with all the other sets too!!

Botday
Blog Candy!! There is a $15 Gift Certificate to the PCS Store available to win! All you need to do is:
1) Follow and comment on each of the blogs. 
2) For extra chances to win you can LIKE Pretty Cute Stamps on Facebook and/or sign up for the Pretty Cute Stamps mailing list. (Leave an extra comment for each on the Pretty Cute Stamps blog as your entry)
A random winner will be chosen on August 8, 2015.


Be sure to check the Pretty Cute Stamps Store to pick up your favorite sets - the New Releases will be on sale through August 11, 2015, and you can save even more by purchasing the  August 2015 Stamp BundleYou can also pick up the SVG outlines for each of these stamps at the store!!

 August 2015 New Releases

There is also a FREEBIE cut file available for today only at the Pretty Cute Stamps blog!

Now, you can head over to the next stop on the hop- Janna's blog!

If you get lost along the way, here's the lineup!


Thanks so much for joining me today! Don't forget to leave your comment for a chance to win :)

P.S. Don't forget to check out our monthly challenge too!


Tuesday, August 4, 2015

Pretty Cute Stamps - Sneak Peek August 2015 New Releases!

I am having a wonderful summer, and I hope you all are too! And even though I am fully enjoying my summer I am really excited about the new releases this month from Pretty Cute Stamps!!


For today's sneak peek I'm sharing the awfully cute Little Pumpkins stamp set! These guys have little interchangeable faces! You decide which pumpkin gets which face - I love it!! I made a watercolour background using Distress Inks and then used Perfect Pearls to stamp stars on the background from the Superheroes stamp set.


I stamped this sweet sentiment (and you have to see all the sentiments!!) with Versamark ink and heat embossed in white embossing powder.

The pumpkins are stamped on orange patterned papers from my stash. I used an alcohol marker to create a shadow around the edges and underneath them.

I stamped another sentiment inside using purple ink to match the background on the front of the card.

You are going to love seeing all the amazing sets in this release! Don't forget to stop back tomorrow for the New Release hop where you get to see everything included. You can stop by the Pretty Cute Stamps blog to see what the Design Team has been doing with all these fun sets all week!


Pocket Letter Goodness!

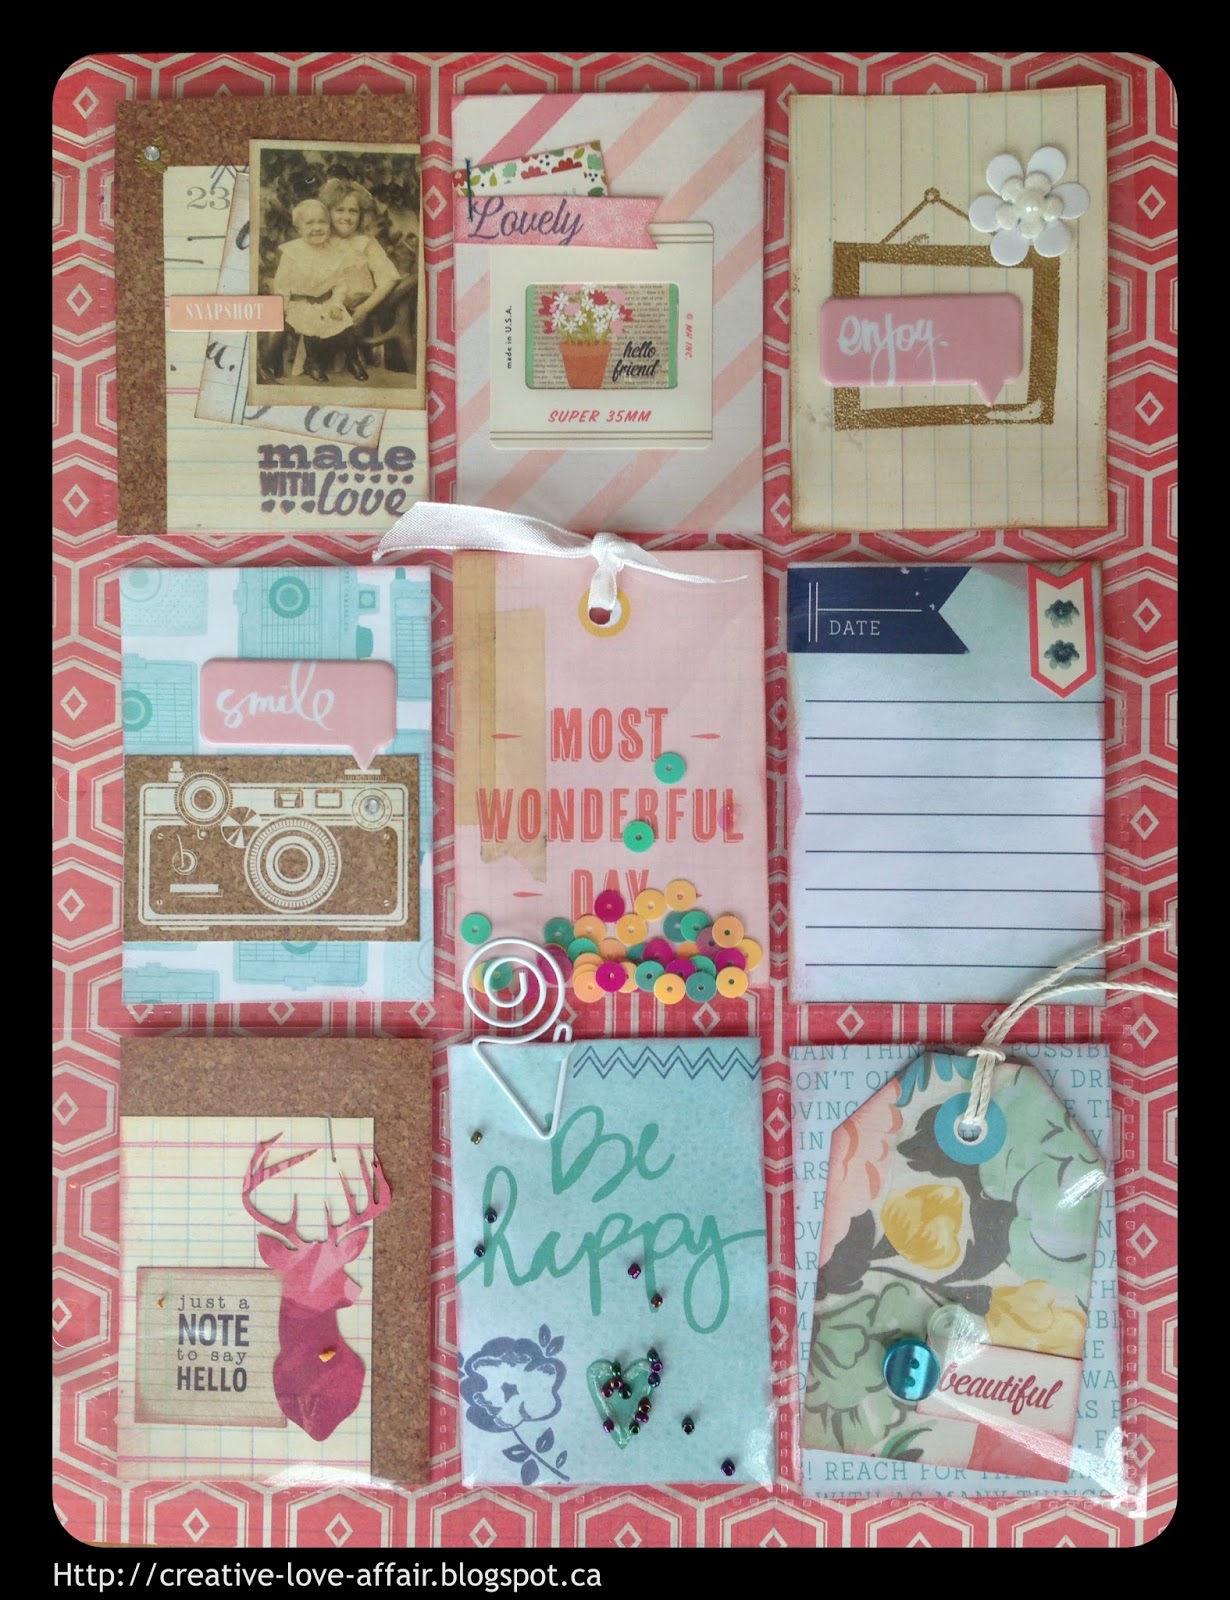
I'm back today to share a post on the Scrapendipity Way Of Life blog! Recently I pulled out some Maggie Holmes and Dear Lizzy papers and I just had to make a Pocket Letter to send to a friend who's been under the weather lately. I layered my papers with fun diecuts from the Maggie Holmes Crate Paper diecut pack and added some Heidi Swapp stickers. I did a little stamping and added some beads and sequins and a cute little paper clip!


On the backside I added in a few more diecuts, some pre-printed and some cut with a machine, some flowers, cork stickers, baker's twine, buttons, washi tape, mini journaling cards, and ribbon.

I love how you can fold these pockets in thirds and pop them into a regular A10 envelope! I added a doily and a couple more diecuts.

I'm sure my friend will have fun getting this surprise in the mail - and I hope it makes feel a bit better! Thanks for joining me today, and I wish you a happy, crafty week!


Monday, August 3, 2015

FCCB #257 - Use A Sketch


Welcome to another Challenge Me Monday...


Challenge #257 Use a Sketch
Make a project using this sketch from Seize the Sketch!


This Weeks Sponsor:


The winner will receive one free class (up to $25!)

To qualify for the prize, be sure to use at least 1 Cricut cut on your project and if it's not obvious, let us know what cartridge you used. If you use a Cricut Explore machine, at least one cut must be from the Cricut catalog of images.

For my project I've decided to do a camping theme. Our family has had a lot of fun camping and I just love all the camper cuts out there now! For the camper and 'camp sites' sign I used the Campin' Critters Cricut cartridge and the Days and Dates cartridge for the rectangle. 


I love being able to use up my paper scraps for these cuts, and using my Cricut Explore makes it easy to see what size I need. I usually reach for my container of 6x6 paper pads.


Thanks so much for stopping by! I can't wait to see what you come up with!! You can check out what the rest of the Design Team has for you at the Fantabulous Cricut Challenge Blog and enter your own project for an awesome prize!


Sunday, August 2, 2015

Online Card Class Background Check - Resist Bookmark!

I just love all the backgrounds I'm completing in the Online Card Class, Background Check! I just had to go ahead and create this fun bookmark using one of the Resist Backgrounds I made.

I also got some new fun accessories for the Prima Paper Doll stamp by Julie Nutting, Marisol and paired with some Maggie Holmes Crate Paper 6x6 paper it seemed like the perfect combination to create this sweet bookmark.


Here's my resist background - The script paper in the background is what I started with. I stamped over it with the flower stamp and Versamark Ink and then heat embossed it with clear embossing powder. After it cooled I blended Distress Ink over my background.

Here are these super sweet coordinating Prima stamps! I can't wait to try the bunny slippers!!

Thanks so much for stopping by today!! Have an awesome weekend!


Online Card Class Background Check - Resist Backgrounds

I absolutely loved these techniques from Online Card Classes, Day 2 by Jennifer McGuire!

Here are my samples:

The script paper in the background is what I started with. I stamped over it with the flower stamp and Versamark Ink and then heat embossed it with clear embossing powder. After it cooled I blended Distress Ink over my background.

I started with a piece of white cardstock for this one and blended blue Distress Ink over the surface, a bit darker towards the bottom. Then I stamped with Versamark and heat embossed with clear powder. After, I sponged Distress Inks over top of the piece and wiped the excess away with a damp cloth.

For this one I used Glossy Paper and stamped the script with Distress Ink in Pine Needles. After drying completely I stamped the floral stamp with Versamark and heat set it without using any embossing powder. The Glossy Paper allows the Versamark to create a resist. Then I sponged over top with my inks and lightly wiped with a damp cloth.

Here's a better look at the resist image!

You can check out my backgrounds from Day 1 here for Ink & Water, here for Ink Reactions, and here for Ink Blending! I hope you're enjoying your weekend as much as I am!