Showing posts with label Prima paper doll. Show all posts

Thursday, February 21, 2019

Paper Doll Canvas with Gyspy Seamstress Papers!

Hello! I am so excited to share a pretty canvas with you that I created for the Canvas Corp Brands blog using the gorgeous 7gypsies Gypsy Seamstress Mixed Media Pad. I love vintage sewing ephemera, and this collection is full of just that! I'm always reminded of my grandmother, who loved to sew and draw my sister and me paper dolls, and this canvas was the perfect combination of those two things! Be sure to check out the video below where you can get a look at exactly what is in this beautiful Mixed Media Pad.


I used Mod Podge to add layers of the pretty papers to a canvas after inking the edges with Distress Oxide Ink, and I created some dimension by using foam tape and curling edges. This cute Julie Nutting paper doll was just perfect to add to the top of the canvas!


I used some Tattered Angels mists to add colour to the rick rack from my stash, and even added a vintage package of the rick rack that I found in my ribbon drawer. A bit of Glossy Accents added a realistic effect to the buttons and snaps I cut from the patterned papers.


Here's a look at everything you get in this beautiful Gypsy Seamstress Mixed Media Pad in the video below!


Thanks so much for stopping by! Be sure to head over to the Canvas Corp Brands blog to get a supply list and see what all the other Crew Members came up with for this challenge!


Tuesday, January 5, 2016

Mini Distress Ink Pad Watercolour Technique!

The kids are back to school and our routines are back to normal, though we all enjoyed Christmas holidays very much! I finally got a little time to sit down and play and try out a new watercolouring technique that I saw in a magazine.

I started by cutting my watercolour paper to 4 x 5.25" to fit on an A2 card with a bit of a border. Then I got out my Distress Mini Ink pads. I don't have a lot of the minis - I just started buying them last year with the new colour releases each month. I must say I really love them though. They're great to take along to a class and I just love the little tin holder. I chose 3 colours that I wanted to use together- Crushed Olive, Twisted Citron and Blueprint Sketch, and lightly pressed them onto the watercolour paper. After I finished putting my ink down I went back with a water brush and coloured over each individual block of colour to give the watercoloured appearance.  I used some grey Archival ink to lightly stamp some Dylusions flowers over top of the background and then stamped a Dylusions border stamp around the edge- lightly adding some colour by scribbling on an acrylic block with a coordinating blue Distress Marker. 


For my tag, I stamped a Prima Doll by Julie Nutting and the Eiffel Tower on watercolour paper and watercoloured the images in with Distress Markers. I added some hand drawn lines around the edge and layered the tag on a piece of blue cardstock. A bit of Stickles adds some shimmer. 

Inside, I used the Bonjour sentiment in this Prima set to stamp my greeting and added some watercolouring with the markers again. 

Thanks so much for joining me today! Be sure to check out the Scrapendipity Way Of Life blog for lots more inspiration, some Canadian Shopping, and if you're local to the Calgary Area some awesome in person classes!

DL Art - Thankful Thursday January Linky Challenge
Simon Says Stamp Monday Challenge - Something New
613 Avenue Create - AG
PDE Linky Party - AG!


Tuesday, December 15, 2015

Prima Doll Christmas Tag!

It is definitely getting closer! Everyone is so excited here in our house! There are Elf On The Shelf happenings, cookies being baked, the tree is decorated, lots of Christmas crafting and concerts to get ready for. I usually don't wrap until right at the last minute, but I did want to get started on my Christmas tags! Since I'm posting at the Scrapendipity Way Of Life blog today, I thought I'd share this cute Prima Doll Christmas tag here too.

I used the smaller doll from the Merry Nice Christmas stamp set by Julie Nutting, which is a perfect size for cards and tags. I stamped her on a piece of white cardstock and then paper pieced her outfit with Heidi Swapp Believe paper from the 6x6 paper pad. I just love tights with designs on them! I stamped some snowflakes in the background with a blue tone Kaleidoscope ink pad and layered on a paper pieced bell and some holly berries, both from the stamp set. The tree is hand cut from the Believe paper and edged with some green ink and I stamped the Merry Christmas sentiment from the stamp set.

This cute little diecut poinsettia paper clip at the top left of my tag is by Kelly Purkey in the Holiday Clips set that includes steel dies for a Christmas tree, poinsettia and gingerbread man along with coordinating stamps and other Christmas stamps and sentiments. It's so cute! After I diecut the clip I stamped with red ink and then added 'just a pinch' of crystal embossing powder for some shimmer!


Here's the back of my tag. I stamped another holly berry on the back and layered on some mini journalling cards from the Believe paper pack before writing To and From. The ribbon at the bottom of my tag is from my stash and was white before I stained it with the new Lucky Clover Distress Stain by Tim Holtz. This colour is yummy!

Thanks so much for joining me today! I hope you're enjoying your Christmas activities and staying cozy and warm.

Linked to:
Cut It Up Challenge blog - Brrr! Winter! (snowflakes and a hat!)
Simon Says Stamp Wednesday Challenge - Tag It!
Simon Says Stamp Monday Challenge - Just A Pinch!
CHNC Christmas Challenge - #259 AG Christmas
CHNC Patterned Paper Challenge - December Link Up
Crafty Hazelnuts Christmas Challenge Extra - December Linkup AG Christmas
Little Scrap Pieces - Show It Off Saturday
613 Avenue Create - AG
Crafting From The Heart - AG
DL Art - Thankful  Thursday December Linkup
PDE Linky Party - AG!


Tuesday, October 13, 2015

Do What You Love Prima Doll Tag!

Hi there! I'm posting over at the Scrapendipity Way Of  Life blog today and wanted to share this sweet tag I made over the summer! We were actually away on holidays, and I wanted to bring a small kit of craft supplies to work on if I had time. I brought along a couple 6x6 pads of patterned paper, some script background paper to stamp my dolls on, and some Prima Paper Doll stamps by Julie Nutting, along with a few pens, ink, Prismacolor markers, glue and some bakers twine. I paper pieced this sweet girl's clothing and hairband from a new Maggie Holmes paper pad I brought. I stashed all my supplies in a 12x12 Iris tote.


I cut the buttons from some Jillibean Soup patterned paper and layered them on my tag, and I even snagged a couple pony beads from my kids' stash to use on my bow. A glittery gel pen added some shine to my project for added detail.

I hand cut pretty flowers from the Maggie Holmes pad and layered on a banner with a handwritten quote, adding that same shimmery gel pen to highlight the words.

I loved having a few supplies with me, perfect for when we wanted to just take a break from activities. I love making up small kits to take along, and I think it makes me even more creative when I know I have a limited amount of supplies to work with! My girls also had fun stamping and colouring in some paper dolls to play with :)

Thanks so much for joining me today! I hope you have a lovely, crafty week!


Saturday, September 19, 2015

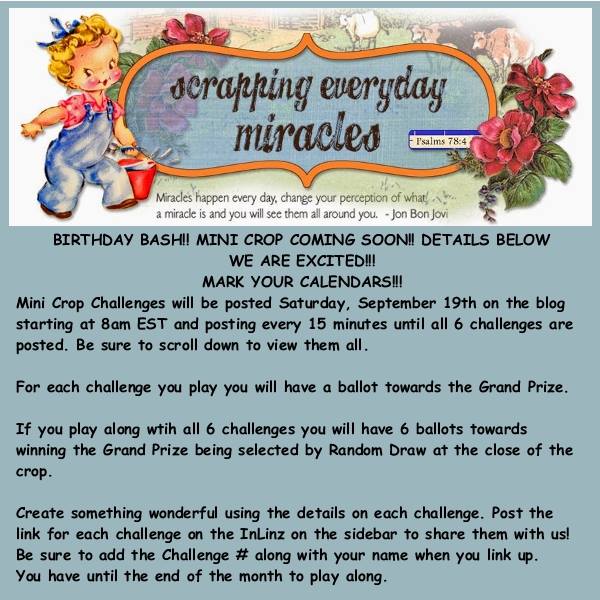
Scrapping Everyday Miracles Birthday Bash Mini Crop!


I am so excited to be part of this amazing Birthday Bash Mini Crop from Scrapping Everyday Miracles! 

For my challenge I'm showing you a card I recently completed for a card swap and thought this challenge would be the perfect thing to share!

I used some pretty paper from Kaisercraft as a background and added a journaling card on top before layering on my elements. The sentiment is stamped and heat embossed and then sponged with Distress Ink before I cut it into a banner shape.


You'll see one of the challenge requirements (below) is to use a bread tag and toothpick - Here I've added paint and embossing powder and the bread tag warped a bit when I heated it, which I thought made it look like a flag!

 I used a Julie Nutting Paper Doll stamp by Prima that I coloured with Prismacolor Markers and paper pieced. I love these mini stamps that fit perfectly on a card!

Inside:

Here's what you need to add to your card to qualify:

1. A button (one or more) 
2. A tooth pick
3. A bread tag
4. A paper clip 
5. Ribbon or a piece of lace 
6. Have a sentiment either on the outside or inside 

 See! Easy-Peasy! Gather up your supplies and get creating! Don't forget to link up on the sidebar before the end of the month for your chance to win a Grand Prize!

Now for some fun Blog Candy!! 


For your chance to win a spot in this awesome Easy Hand Lettering class that the talented Tracie Claiborne has so generously donated, just make sure to follow my blog and leave a comment on this post!! One winner will be chosen on Saturday, September 26th, so leave your comment by 9 am that morning for your chance to win!

You can join in all the Birthday Bash Mini Crop fun by checking out the Scrapping Everyday Miracles blog and all the challenges the other designers have come up with!

Thanks so much for stopping by today! I hope you have a wonderful crafty weekend :)


Tuesday, September 15, 2015

Mermaid Art Journal Tutorial!

I'm posting today at the Scrapendipity Way Of Life blog and I'm sharing this lovely art journal page I made using lots of mixed media supplies and the Julie Nutting Mermaid doll stamp by Prima!


Here's a little tutorial showing you how I made it-

I started off with my Dylusions Journal and used Distress Stain to rub colour across my pages. I had previously rubbed off some stencils on these pages and you can see some colours underneath.

I then used Dylusions yellow paint over a Tim Holtz sunray stencil to create my sunrise and spritzed the pages with Perfect Pearls mist to add shimmer and blend the colours slightly.

I used more Dylusions paints and stencils to create a background. I sponged the blue paints through the TH flourish stencil and then used the circle stencil to add white circles. I used bubble stamps and the purple paint to stamp on bubbles, which you'll be able to see below.


 Here's Erica working with some purple paint and stamping those fun bubbles!

I paper pieced and coloured my stamped images (I used the BoBunny Boardwalk paper for my mermaid) and then Mod Podged them onto my paper. 

I added some stamps on top of my journal and then used the Dylusions Ink Sprays to paint in my leaves. I love using the sprays this way! I wanted to distress the cute sea creature stamps a bit so I stamped a Dylusions background stamp over top using Vintage Photo Distress Ink.

You can see how the Dylusions purple paint bubbles resists the spray that I painted onto the leaves and it seems to blend into the background! I absolutely love this 4x6 journaling card from the Laughing Lola Picture My Life cards by CTMH. I love the cards included in these collections - there are so many things you can use them for!


Lastly, I added some Distress Markers to the stamped images and then used Glossy Accents and Stickles around my page. You can see how the butterflies really pop after adding the Glossy Accents! I traced around my Mod Podged images with a brown Distress Marker and used a waterbrush to lightly blend the marker around each image.


I just love how these pages turned out! I love all the layers and the way each medium works together. This mermaid doll is one of my favourites! 


Thanks so much for joining me today! I hope you have a lovely week! Be sure to check back this week - there is lots going on with the Pretty Cute Stamps September Release as well as a fun Birthday Bash Mini Crop on Saturday!!

Linked to:
Simon Says Stamp Wednesday Challenge - use a stamp
Simon Says Stamp Monday Challenge - love this technique (layering different mediums & using Dylusions sprays to paint with)


Wednesday, August 26, 2015

Stenciled Tag Tutorial!

I'm posting today over at the Scrapping Everyday Miracles blog and I'm sharing this Prima Doll Tag as a tutorial!

 I first started by cutting a tag the size I wanted and then pulled out some stencils and Distress Inks.


I used more Distress Ink in Tumbled Glass and a Tim Holtz butterfly stamp to stamp a light image on the bottom left of my tag.


For my ribbon I used some seam binding ribbon and rubbed Distress Stains directly onto it, then I spritzed lightly with water and crumpled the ribbon with my fingers before drying with my heat gun. This blends some of the colours and crinkles it nicely.


Now, it was time to create the Prima Paper Doll that I wanted to use on the tag! I'm really liking the way these dolls look stamped on a script paper, so I stamped my doll directly onto the script paper shown in the picture below and then used a light peach Prismacolor Marker, which is alcohol based, to colour in the face and skin areas.


I used the yellow floral paper, from the CTMH  Brushed Paper Collection to paper piece her hair and paper from the Crate Paper Flea Market Maggie Holmes paper pad for her clothes. I also used journaling cards from the Picture My Life CTMH Skylark Collection to layer behind the doll.


I added some paper flowers and gems to my tag and a couple layers of ribbon along the bottom of the tag.


I wanted to add a quote, so I used the Tim Holtz Small Talk stickers, cut apart to fit inside a frame I diecut with a Spellbinder's Die. I traced around the quote with a black pen and added a heart sequin to finish it off.

I love this quote - it reminds me that my day is so much better when I take a few minutes to think of what I'm thankful for first thing in the morning. Then, instead of focusing on anything that might be negative I'm feeling happy about those big and little things that make life amazing!


Thanks so much for joining me today! Don't forget to stop over to the Scrapping Everyday Miracles blog to see all the amazing posts this month and join in our awesome challenges for your chance to win a prize!! You still have a few more days left to enter your project!


Sunday, August 2, 2015

Online Card Class Background Check - Resist Bookmark!

I just love all the backgrounds I'm completing in the Online Card Class, Background Check! I just had to go ahead and create this fun bookmark using one of the Resist Backgrounds I made.

I also got some new fun accessories for the Prima Paper Doll stamp by Julie Nutting, Marisol and paired with some Maggie Holmes Crate Paper 6x6 paper it seemed like the perfect combination to create this sweet bookmark.


Here's my resist background - The script paper in the background is what I started with. I stamped over it with the flower stamp and Versamark Ink and then heat embossed it with clear embossing powder. After it cooled I blended Distress Ink over my background.

Here are these super sweet coordinating Prima stamps! I can't wait to try the bunny slippers!!

Thanks so much for stopping by today!! Have an awesome weekend!