Monday, July 14, 2014

FCCB #219- Day At The Beach

 Happy Monday and welcome to another Monday challenge!


Challenge #219 Day at the Beach

This Weeks Sponsor
$50.00 Gift Certificate
~This Weeks Challenge~
Day at the Beach
Create a project related to the beach

To qualify for the prize, be sure to use at least 1 Cricut cut on your project and if it's not obvious, let us know what cartridge you used.

Here is my project for this week:
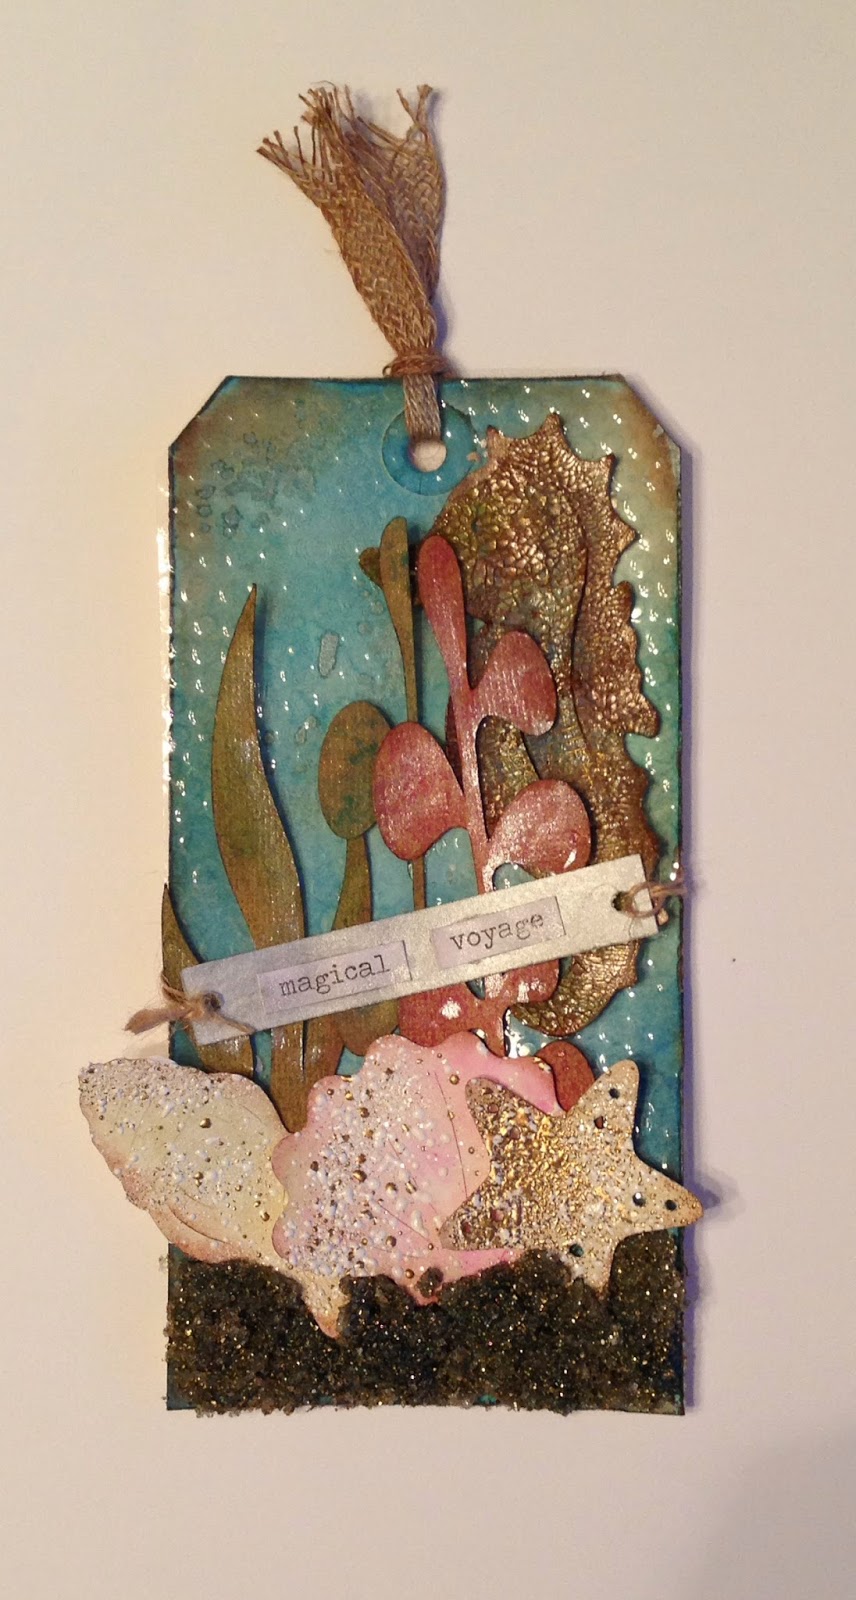
 When I saw the 12 tags of 2014 Tim Holtz tag for July I had to make one! This was so cool - check out the link for step by step directions to complete this tag. I used the Create A Critter and Everyday Paper Dolls Cricut cartridges to cut my shells, seahorse and water plants.


I embossed clear acetate with a bubble embossing folder to go over top my distressed tag - love that process!!

 I used some Stampendous Shabby White embossing powder, which has large and small white embossing powder pieces as well as flecks of gold - so pretty!


I used Tim's recipe to create the sand on the bottom - I didn't have exactly the same ingredients, but it still worked using UTEE, Glossy Accents and embossing powders. It looks so shimmery in the light!


I followed Tim's instructions to cover the seahorse, which I cut from watercolour paper. I love how the Distress Stain seeps into the cracks of the Clear Rock Candy Crackle. I added a bit of Perfect Pearls mist over the plants to add a little glimmer.


This tag looks perfect on my seaside summer mantle!


Thanks for joining me! Be sure to check out the lovely projects the Fantabulous Cricut Design team created this week, and enter your own for a chance to win an awesome prize from our sponsor - SVG Cuts!! (check out their amazing inspiration)

Challenges:
DL Art - Thankful Thursday July Linky Party
Simon Says Stamp Wednesday Challenge - Lets Be Clear (acetate background)

Sunday, July 13, 2014

Hello Beautiful

Well I had to get in a card for Mojo Monday this week!

I was inspired by the Capture Life scrapbooking paper pack I had been using to scrapbook and thought it would make the perfect card. I really like the look of the bokeh paper in the background - I think I may need to get more of this! The little square on top was part of a preprinted paper in the pack, and I used the Tim Holtz debossing folder for the hello sentiment.


I started from scratch with acetate and a manilla tag.  I used alcohol inks, including the silver metallic one, on the acetate (I didn't end up using the rectangle), and I layered Distress Inks on the tag and then sponged over top with a Crafter's Workshop viewmaster stencil.  The diecut is a Tim Holtz viewmaster cut - love it!!


I cut the right side of the tag off and embossed the cut-off portion with a ruler embossing folder. I never get tired of the way Distress Ink reacts to droplets of water on top! 


The half circle of alcohol inked acetate was placed behind the viewmaster diecut. I love the way it looks like a scene in the little windows!


 Challenges:
Mojo Monday 353 - Sketch Challenge
Simon Says Stamp Monday Challenge - Start From Scratch (my tag and viewmaster background)
Simon Says Stamp Wednesday Challenge - Lets Be Clear (acetate)
PDE Linky Challenge - Tags
DL Art - Thankful Thursday July Linky Party

Hope everyone enjoyed their weekend! We had a very sunny, warm one here and enjoyed going for a walk along the river, the amusement park and the Farmer's Market as well as going to an 'old fashioned' ice cream parlour (yay for the kids) and a beautiful quilt store (yay for me). Ok, I enjoyed the ice cream too, lol.


Happy Crafting!

Karla

Saturday, July 12, 2014

Make A Wish - Deconstructing Jen Sketch 158

Last week I went over to my friend's place for a play date - the kids played with toys while we played with paper!

The background paper is by Jillybean Soup. I've used this 6x6 pad quite a bit - I love the fabric look of it!

This is the sketch I used. There are so many awesome sketches and inspiration from this site!

I stamped on watercolour paper and used Distress Markers for my focal image. 


I fussy cut the noisemaker and popped it up with foam dots. 

Inside I stamped a sentiment and paper pieced the banner. 

Challenges:

Little Scrap Pieces - Show It Off Saturday
DL Art - Thankful Thursday July Linky Challenge
Deconstructing Jen - Sketch 158

I hope you are keeping cool and enjoying your weekend!

Happy Crafting!

Karla

Monday, July 7, 2014

Hello You - Gorjuss Girls

Well, I had to get in a shaker card for the Simon Says Stamp Wednesday Challenge! I don't often make them, but they add such a fun element to the card.

The cute Gorjuss Girl was coloured with Distress Markers on watercolour paper and I paper pieced her dress.  This was such a cute stamp! It comes with little baby foxes - I can't wait to use them!

I embossed the background shapes with a wood grain embossing folder using Core'dinations paper and lightly sanding the background.

I used a sketch from the Die Cuttin' Diva's Challenge Blog, but oops, I was a little too late to post it over there!

I used Spellbinder's Nestabilities and Shapeabilities for my cuts. Instead of adding a pre-made shaker element, I started from scratch and added a piece of clear acetate die cut in the same size on top.  I glued it around the edges after adding some Tim Holtz Clear Distress Glitter inside to create my shaker.


 The sentiment shaker was stamped with a greeting from Simon Says Stamp - one of their exclusive stamp sets that came with the February card kit.


Inside I used more Simon Says Stamp exclusive stamps, Distress inks and the stars from the Gorjuss stamp set.

Wishing everyone a happy Monday evening! We had another beautiful day here :)

Challenges:
Simon Says Stamp Wednesday Challenge blog - Shakers
Simon Says Stamp Monday Challenge blog - make something from scratch

Happy Crafting everyone!

Karla

FCCB 218 - Summer Treats

Happy Monday and welcome to another Monday challenge!


Challenge #218  Summer Treats

This Weeks Sponsor

Winner will receive Silly Shells Stamp Set
~This Weeks Challenge~
Summer Treats
Create a project that represents the tastes of summer

To qualify for the prize, be sure to use at least 1 Cricut cut on your project and if it's not obvious, let us know what cartridge you used.

For my project this week I chose to create a Happy Birthday tag and gift bag for my daughter's friend's birthday.  I used the Just Because Cards Cricut cartridge to make the cute popsicle tag card.  Using the Gypsy I welded 2 of the shadow shapes together - flipping one side so it would match the other - to create the card base. I used the matching words to create the inside sentiment and used white embossing powder to heat emboss the Happy Birthday greeting on the front. 


 For the bag I used the same popsicle cut again, in green, and the Stretch Your Imagination Cricut cartridge to cut the Summer, watermelon and ice cream. The butterflies are a Stampin' Up stamp, using Distress Inks.


I attached the tag with some hemp twine and the birthday gift was ready to go!!


I hope you are all enjoying your summer! We have been having some very nice weather and enjoying some time at the lake :) Our summers seem too short here not to enjoy every minute we can! We were fortunate enough to be invited by friends in our church to a BBQ at their lake, and the girls loved it! 


Challenges:
Little Tangles - #40 Tag - You're It!
DL Art - July Thankful Thursday Linky Party

Happy Crafting!

Karla

Friday, July 4, 2014

Big Girl - Midweek Mojo Pansy #1

While sorting through my pics from last summer I came across these 2 cute ones of my baby - not so much a baby anymore :)

I found a sketch challenge run by Scrapbook.steals.com called Midweek Mojo.  Who doesn't love a challenge?! I actually love using sketches for my pages - it kick starts my creativity!

I used the Capture Life paper collection from Echo Park - love this!!


The Sketch from Midweek Mojo:

I cut strips of paper along the bottom of the pics and layered them. The squares of  patterned paper and stickers also came in the pack, and I layered them over the bottom sheet of the 12x12 paper.

Did some journalling inside the squares.

I can't believe how much she's changed in the past year!

Hope you get a chance to do a little something crafty this weekend!

Challenges
Midweek Mojo - Pansy #1
DL Art - July Thankful Thursday Challenge
PDE Linky Party - Many Layers
613 Avenue Create - Anything Goes
Crafting From The Heart - Anything Goes

Happy Crafting!

Karla

Wednesday, July 2, 2014

Wallet Swap

Last month's project with the swap group I belong to was a very cool wallet made from two sheets of 12x12 paper. The theme was to choose a hero.

It was very easy to come up with mine- my Nanny Parry, and since my sister was who I was sending mine to it was perfect! 

This is the cover:

Jillybean soup has some cute paper with buttons on it, and I fussy cut some and used some real buttons. Nanny loved sewing so I had to use the Tim Holtz vintage sewing machine stamp! I stamped in Kraft and used the Picket Fence Distress Marker to highlight some of the image. 

I used this wallet style mini brag book tutorial - http://youtu.be/oWP4Vs_YtAY. I wasn't sure if the Kraft cardstock would hold up to the folding, but it worked great. Once you make one, you will be addicted! These would be perfect gifts and could be given with just the background papers attached so your recipient could embellish it themselves, or you could personalize it for them. 

This is the cover opened up:

I used the Cricut to cut out the font (Cursive 101) and the vintage sewing machine (Heritage). The background paper is from CTMH. 

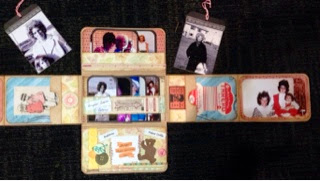
This is the bottom flap flipped down. You can see there is lots of space for pics!


I used a square cut from the EP Capture Life collection, some buttons diecut with a Spellbinders die, some Jillybean soup papers and a teddy bear cut with the Heritage Cricut cartridge on the bottom flap. 


In the middle, each side opens up, and I cut tags to fit inside a pocket under the cover. 


Inside each of the middle flaps is a spot for two tags. I typed journalling on the back of each tag. The pictures on tags in the very centre can be seen below. 


The bottom flap opens again and I typed some journalling and added things that reminded me of my grandmother. 


These are the tags I put in the very centre, inside the wallet. 


The backside of the wallet and the backside of each of the tags above. 


It ended up being fairly thick so I tied a silk ribbon around it to present it to my sis. 


Of course, she loved it, and I loved making it! 

Challenges-
613 Avenue Create - Anything Goes
Crafting From The Heart - Anything Goes
DL Art - July Linky Challenge 
PDE Linky Party - Many Layers

Hope everyone in Canada had a happy Canada Day! And happy wishes for a wonderful 4th of July to my US neighbours!

Happy Crafting!

Karla