Tuesday, September 29, 2015

Project Life Week 18!

I'm posting at the Scrapendipity Way Of Life Blog today and thought I'd share Week 18 of my Project Life! I love embellishing my pages with diecuts from ephemera packs!

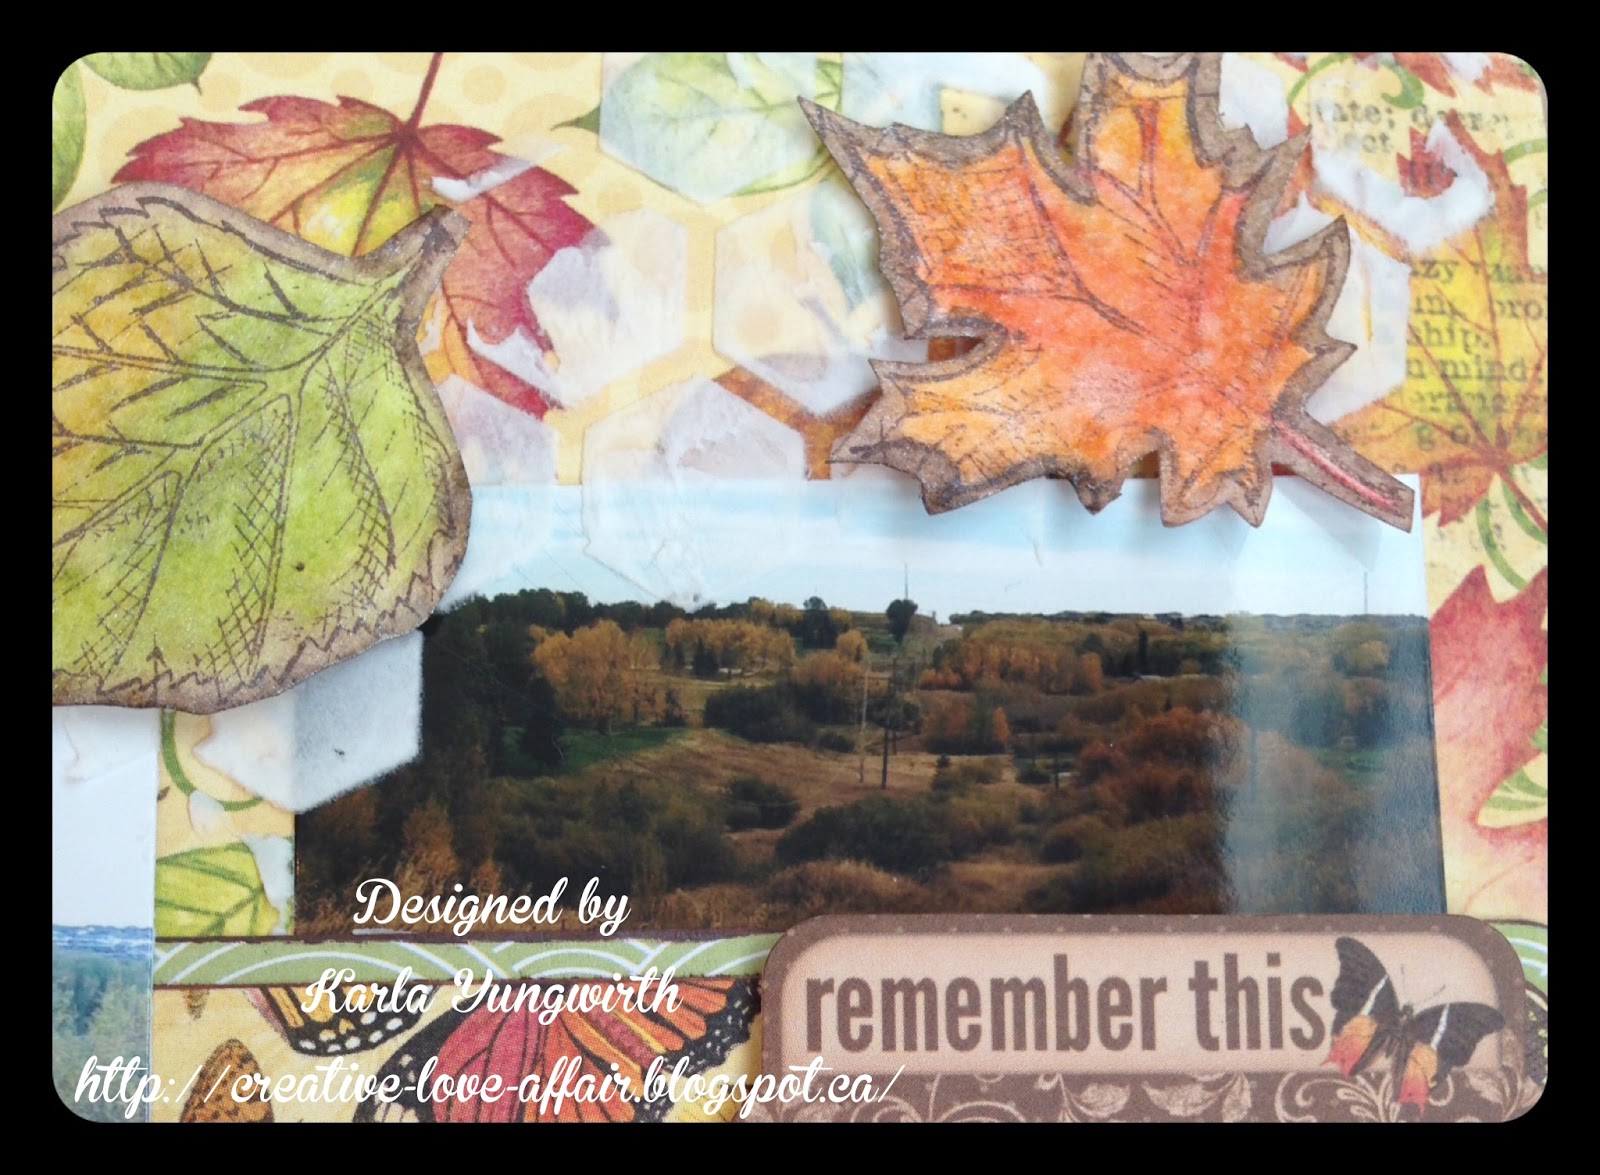
I used the Rhonna Design App to decorate the Week 18 card from the Project Life app and printed it with my photos. When I'm designing my pages I first lay out my photos where I think they'll fit and then choose journaling cards. After I decide where my cards will go I start adding things like diecuts from different ephemera packs. Some of my favs are the Simple Stories, Maggie Holmes and My Minds Eye packs right now!


I love layering and will often use patterned paper as a background instead of journaling cards, especially when I want to layer a small photo into a larger pocket. I love using 6x6 paper pads for this!

  I used gold accents throughout my Week 18 pages, but I don't mind mixing and matching patterns!

I love being able to journal in the Project Life app and then print the card out with my photos and embellish it when I put it in my album. 

Sometimes I will just use a piece of patterned paper cut to the pocket size without any embellishments. The nice thing about this hobby is being able to add as little or as much as you like!

Thanks so much for joining me today! I hope this gives you some ideas for your Project Life or pocket page scrapbooking!

Linked to:
613 Avenue Create - AG
DL Art - Thankful Thursday September Linky Challenge
PDE Linky Party - AG


Monday, September 28, 2015

FCCB #261 - Shape Up!


 Happy Monday and welcome to another Monday challenge!


Challenge #261-Shape Up
Make a Shaped Card (anything but a square or rectangle)

This Weeks Sponsor
Pretty Paper, Pretty Ribbons


To qualify for the prize, be sure to use at least 1 Cricut cut on your project and if it's not obvious, let us know what cartridge you used. If you use a Cricut Explore machine, at least one cut must be from the Cricut catalog of images.

And, if you submit a project in our challenge that isn't a card, you will get two entries for a chance to win the prize instead of one!

For my project I've used the Pumpkin Card from the Mini Monsters Cricut cartridge, a Basket from the Art Philosophy cartridge and leaves from the Creative Bug cartridge, all cut with the Cricut Explore. I also added the scroll cuts and sentiments from the Pretty Paper Pretty Ribbons Fall Phrases SVG files.

I stamped and heat embossed with a scroll stamp using gold embossing powder on the base layer of the card. Then, I ran the top layer through an embossing folder in my Cuttlebug and gently sanded it to highlight the embossing detail.


I changed the scoring feature to 'Write' on the leaves and used an American Crafts white chalkboard pen to draw in the veins on the leaves. I added my PPPR sentiment inside the card and some scrolls and leaves to my card and box. I thought this box would be nice as a Thanksgiving table decoration!


On the opposite side of the box I added another sentiment and leaf.

Here's a look at what's included in the PPPR Fall Phrases Cutting Files:

Don't forget to pop over to the Fantabulous Cricut Challenge Blog to see what all the other Design Team members have come up with for this fun challenge! You can enter your own project with at least one Cricut cut for a chance to win an awesome prize from our Sponsor - Pretty Ribbons Pretty Paper!


Sunday, September 27, 2015

Lawn Fawn Give Thanks!

I'm still having lots of fun with my Lawn Fawn stamps!! Here's a cute little Thanksgiving one using the Thankful Mice set. I wanted to make a one layer card for the Lawnscaping Challenge Blog using these cute little guys!

One layer cards are not one of my strengths! I'm too impatient to think forward the steps to mask and plan ahead.... however, I have been playing around with masking more lately and I really had fun with this card!

I started out by stamping these cute mice with Memento black ink on a piece of white cardstock. I added the cheese and the plate (from the Love You A Latte set) and then masked them all and added a mask to the bottom of my card by hand cutting a rounded piece of cardstock.

I used a Tim Holtz stencil over the top part of my card and pressed Versamark embossing ink through the stencil. I heat set Crystal embossing powder to give a bit of a shimmer to the embossed area and then used Distress Inks to sponge ink on my card. The embossing powder acted as a resist, leaving the 'sweater' pattern white.


I coloured in my images using Prismacolor Markers and used a brown Distress Marker to create stitching lines. I stamped the sweet sentiment (love the font!) in brown ink and added the heart stamp, which also came in the set, to each side. A little Glossy Accents on this yummy cheese adds another bit of dimension while keeping it one layer!


Thanks so much for joining me today! I hope you enjoy a very happy, very crafty week!!

Linked to:
Lawnscaping Challenge - One Layer Cards
Simon Says Stamp Monday Challenge - Add A Stamp
Simon Says Stamp Wednesday Challenge - No Designer Paper
613 Avenue Create - AG
Pink & Main - AG


Saturday, September 26, 2015

Winner of Easy Hand Lettering Class & Lawn Fawn Cards!

I just love giveaways, and I'm so excited to announce the winner of the amazing Easy Hand Lettering Class  by Tracie Claiborne!

And the winner
chosen by Random.org
 is....

comment #5
Sam!
Great card. The colors are so pretty!

Sam, you can contact me at karlajyungwirth at gmail dot com with your email address within one week to claim your prize! Thanks so much for everyone who commented. Don't forget you still have a few more days to play along with the challenges at Scrapping Everyday Miracles for more prizes!
And now, I wanted to share a couple fun cards using the Lawn Fawn stamp set, Love You A Latte! I'm so excited because we had the Great Canadian Scrapbook Carnival here in Calgary over the weekend! With the dollar so low here in Canada right now I have not done any online shopping for a long time. So, Friday I took my daughter and we drove 45 mins both ways to go to the Carnival to do a bit of shopping. I was really excited to find some fun Lawn Fawn stamps there as well as a few other items that I wouldn't normally have access to. And the fall leaves are absolutely beautiful right now, so it ended up to be a wonderful drive and a fun afternoon - that I'm still enjoying!
I used the Basic Grey Highline 6x6 paper pad that I also picked up - and love!! as background paper on my cards. I stamped the yummy coffee images with Memento Tuxedo Black ink on white paper and used Prismacolor Markers to color the images in. I just love these scrolly sentiments!


I masked off the cup and spoon before stamping the plate so everything was layered on my paper. I watched the Lawn Fawn intro video for this set and I loved the way she added the shading around the cup, plate and spoon!

 I used the same paper pad for my second card, varying the background paper. I cut my focal image into a tag, added some twine and used foam dots to pop it up on my card.

I masked my image again and added Distress Inks to create a background. I made the rounded base by cutting a sticky note to use a stencil.

These cards were so much fun to create! I can't wait to make some more using all the awesome stamps in this set!! Thanks so much for joining me today - I hope you have a wonderful weekend!
Linked to:
DL Art - Thankful Thursday September Linky Challenge
Little Scrap Pieces - Show It Off Saturday


Tuesday, September 22, 2015

Farmer's Market Scrapbook Layout!

I'm posting today over at the Scrapendipity Way Of Life Blog and wanted to share this fall page using the September kit from the Scrapendipity Truck. I just love these BoBunny papers and had to find some fall pics to scrap right away!

When the leaves start turning here in Alberta, you have to get out quick to get a few photos. They might only last on the trees a couple weeks until we get a few windy days - and then they're gone! I don't seem to have an abundance of fall photos, so I have to get the ones I do have scrapped. We have a nice farmers market close to us that we like to go to and happened to go at a time when the trees in the background were just changing colour.

This leafy BoBunny background paper is one of my favourites - I think I'm going to have to pick up more of this! I layered my pics on and then used the cut-apart sheets to layer on my page as a title and journaling card. I stamped the Tim Holtz leaf blueprint stamps onto some watercolour paper and let my girls watercolour the images with Distress Markers. I spritzed the leaves with Perfect Pearls mist to add some pretty shimmer!


I used some white Ranger texture paste and a Heidi Swapp stencil on the top right and lower left areas of my page. After it dried I popped my leaves up with foam dots to give them dimension. I wanted to give the clear gems some colour before I added them to the right side of the border strips, so I coloured them with an orange Prismacolor alcohol marker - perfect!


There are lots of lovely paper diecuts that come in the coordinating BoBunny ephemera pack - I used the 'remember this' diecut layered on one of the cut-aparts. I love how the texture paste is thin enough to show the details of the paper through it!


Thanks so much for joining me today! Fall is my favourite season - putting on a cozy sweater, baking pumpkin muffins, and not feeling guilty for staying inside to scrapbook ;)! Here's wishing you have a lovely week full of what makes you happy!

P.S. Be sure to check out these fun things going on right now!!
**Birthday Bash Mini Crop & BLOG CANDY details here - comment for your chance to win an awesome class!!
**Pretty Cute Stamps Challenge Add A Button details here!
**Scrapping Everyday Miracles September Challenge details here - you could win a gift certificate to Pretty Cute Stamps!!

Linked to:
Simon Says Stamp Monday Challenge - Use a stamp
DL Art - Thankful Thursday September Linky Challenge
613 Avenue Create - AG
Canadian Scrapbooker Magazine - Sept Sketchy Challenge


Sunday, September 20, 2015

Pretty Cute Stamps Feature - Superhero Birthday!

I'm catching up on my Project Life pages and I wanted to share these cute photos from my niece's Superhero Birthday Party! Of course, I had to dress up these pages using the Superheroes and Super Sentiments stamp sets!!

I first used my Explore to cut out the coordinating SVG outlines and then stamped the images. I used Prismacolor Markers to colour them in. I love all the different sizes of stars that come in the set! Perfect for stamping all over my journaling cards! I used the sentiments to stamp over different areas of my pages, even masking off some of the stamps to get parts of the words.

I used some of the Cricut decorations I cut for the party and added them into my pockets as well as diecutting the little stars, stamping and then colouring them.


I sure love this little superhero stamp I used below! He looks like he's having so much fun! I think it's so cool to be able to personalize the journaling cards with these stamps.


Here's a look at what's in these awesome stamp sets:

Super Sentiments

Superheroes


Thanks so much for joining me today!! I hope you'll try using some stamps on your scrapbook or Project Life pages! 

Don't forget to check out all the fun things happening right now with Pretty Cute Stamps:
- the September New Releases are on still on sale at the store!
- you can check out all the inspiration from the Design Team using these new stamps last week on the PCS blog!
- the current PCS challenge is 'Use A Button'


Saturday, September 19, 2015

Scrapping Everyday Miracles Birthday Bash Mini Crop!


I am so excited to be part of this amazing Birthday Bash Mini Crop from Scrapping Everyday Miracles! 

For my challenge I'm showing you a card I recently completed for a card swap and thought this challenge would be the perfect thing to share!

I used some pretty paper from Kaisercraft as a background and added a journaling card on top before layering on my elements. The sentiment is stamped and heat embossed and then sponged with Distress Ink before I cut it into a banner shape.


You'll see one of the challenge requirements (below) is to use a bread tag and toothpick - Here I've added paint and embossing powder and the bread tag warped a bit when I heated it, which I thought made it look like a flag!

 I used a Julie Nutting Paper Doll stamp by Prima that I coloured with Prismacolor Markers and paper pieced. I love these mini stamps that fit perfectly on a card!

Inside:

Here's what you need to add to your card to qualify:

1. A button (one or more) 
2. A tooth pick
3. A bread tag
4. A paper clip 
5. Ribbon or a piece of lace 
6. Have a sentiment either on the outside or inside 

 See! Easy-Peasy! Gather up your supplies and get creating! Don't forget to link up on the sidebar before the end of the month for your chance to win a Grand Prize!

Now for some fun Blog Candy!! 


For your chance to win a spot in this awesome Easy Hand Lettering class that the talented Tracie Claiborne has so generously donated, just make sure to follow my blog and leave a comment on this post!! One winner will be chosen on Saturday, September 26th, so leave your comment by 9 am that morning for your chance to win!

You can join in all the Birthday Bash Mini Crop fun by checking out the Scrapping Everyday Miracles blog and all the challenges the other designers have come up with!

Thanks so much for stopping by today! I hope you have a wonderful crafty weekend :)


Friday, September 18, 2015

Pretty Cute Stamps Challenge - Include A Button!

Oh, it's time for a new challenge over at the Pretty Cute Stamps blog, and this month your challenge will be to include a button on your project, as well as using a Pretty Cute Stamp!

For my project I've gathered a bunch of sets together and had a lot of fun creating this cute birthday card!

I first used the coordinating SVG files to cut out the Forest Friends stamp sets with my Explore before stamping and colouring in with Prismacolor Markers. I just love these SVG files :) I added some foam dots to several stamped images to give them some dimension and create a scene on the card.


I used the party hats from the Wish Big stamp set by masking around the stamps first! I love using stamps this way. The balloons are from the BOTday set.

The tree is from the Oh Christmas Tree set -  I used some pretty green paper and shaded with a Prismacolor Marker. I tied some bakers twine through a button and added it to a little banner stamped with a sentiment from the Forest Friends set.

Inside - a sentiment from the Wish Big set. 

Thanks so much for joining me today! I hope this inspires you to pull out several different stamp sets you have to see how they might work together - maybe even using a holiday set in a different way! You can check out what all the other Design Team members have come up with for this challenge over at the Pretty Cute Stamps blog - and enter your own project for a chance to win a gift certificate!

P.S. Don't forget all the September New Release Stamp Sets are on sale right now! Be sure to head over to the Pretty Cute Stamps Store to check them out!

Linked to:
Simon Says Stamp Monday Challenge - Love This Technique (paper piecing)


Thursday, September 17, 2015

Pretty Cute Stamps September New Release Blog Hop!

Thanks so much for joining us for the September 2015 New Release Blog Hop, where we are all sharing projects featuring the new stamps this month that are now available in the Pretty Cute Stamps Store!!


If you came from the Pretty Cute Stamps blog, you are in the right place. If you just stumbled across this post and would like to start from the beginning, please visit the Pretty Cute Stamps Blog

For my project for the hop, I'm featuring the awesome School Planner stamp set, which I used in creating a September calendar layout on my family calendar.

School Planner
I stamped some of the images with Colorbox Pigment Inks and some in black and I coloured them with coloured pencils as well as Distress and Tombow Markers. I found that as long as I didn't saturate the paper with the marker and coloured lightly it didn't bleed through to the other side. 


I used the School Planner stamp set on each of these dates- 1, 3, 4, 7, 9, 10, 11, 14-19, 21-25, 29 and 30th. 


I used a combination of ballpoint pens in coloured inks and the small nibs on the markers to write on the calendar. 


I found the Everyday Planner set perfect to use on my calendar as well! I used it on these dates - 1, 6, 8, 10, 11, 13, 14, 20, 25, 26, 27, 29 and 30th. 


I totally adore all the little mini icons that coordinate with the words! So cute!


I added the Bushels Of Fun Apple basket to the top of my calendar and lightly water coloured it with Distress Markers. Because it was the first page it was a heavier cardstock and it didn't soak through. I found the quote online and wrote it out with a black Smash Book pen.


Here's a list of the other Pretty Cute Stamps I used on my calendar:
3rd- Be Mine
13th- Botday

I really had a lot of fun decorating this month's calendar for our family! I love this School Planner set and have lots more in mind that I'll be using this set for! I hope this calendar also inspires you to use your stamps in creative ways! There are so many little details in the awesome stamps from Pretty Cute Stamps - they are perfect for that!


Blog Candy!! There is a $15 Gift Certificate to the PCS Store available to win! All you need to do is:
1) Follow and comment on each of the blogs. 
2) For extra chances to win you can LIKE Pretty Cute Stamps on Facebook and/or sign up for the Pretty Cute Stamps mailing list. (Leave an extra comment for each on the Pretty Cute Stamps blog as your entry)
A random winner will be chosen on Monday, September 21, 2015.

Be sure to check the Pretty Cute Stamps Store to pick up your favorite sets - the New Releases will be on sale through September 22, 2015, and you can save even more by purchasing the  September 2015 Stamp BundleYou can also pick up the SVG outlines for each of these stamps at the store!!

There is also a FREEBIE cut file available for today only at the Pretty Cute Stamps blog!

Now, you can head over to the next stop on the hop- Joann's blog 

If you get lost along the way, here's the lineup!


Thanks so much for joining me today! Don't forget to leave your comment for a chance to win :) If you haven't checked out the Thursday blog hop - you can find the lineup on the blog! I hope you have a relaxing and very crafty weekend :)