Hi friends! Well September is almost here - I've had my first Pumpkin Spice Latte!! The girls head back to school Tuesday, school lunches are planned, groceries bought, outfits picked out... Holy, did the summer ever go by fast! Well, I have a cute card to share with you today with some beautiful Fall colours using some sweet stamps and dies from Your Next Stamp (one of my fav stamp companies!) and using Seth Apter's Paper Artsy paints.
I used the Paper Artsy paints to paint a background in an ombre effect and used the Photo Booth YNS die to cut it all out. I love how many different elements this die cuts out!
I coloured the cute critters from the Phoebe and Pets YNS stamp set with watercolour pencils and tucked them back into the diecut windows.
I love the diecut SMILE that comes with the photobooth die! Did you know you can rearrange the letters to spell Slime, Miles and Limes as well, lol!
Here's a look at the gorgeous colours included in Seth's Autumn Paint Set. Be sure to check out my Halloween Album HERE to see how I mixed colours and use these paints in another project!
I added shimmery glitter paste over the stars to give them lots of sparkle and sprinkled on some SpiegelMom Scraps Sequins (Don't forget to use the code KARLA15 to save 15% off in the SMS Shop!)
Thanks so much for stopping by! Hope you have a wonderful crafty weekend and a great start to September!
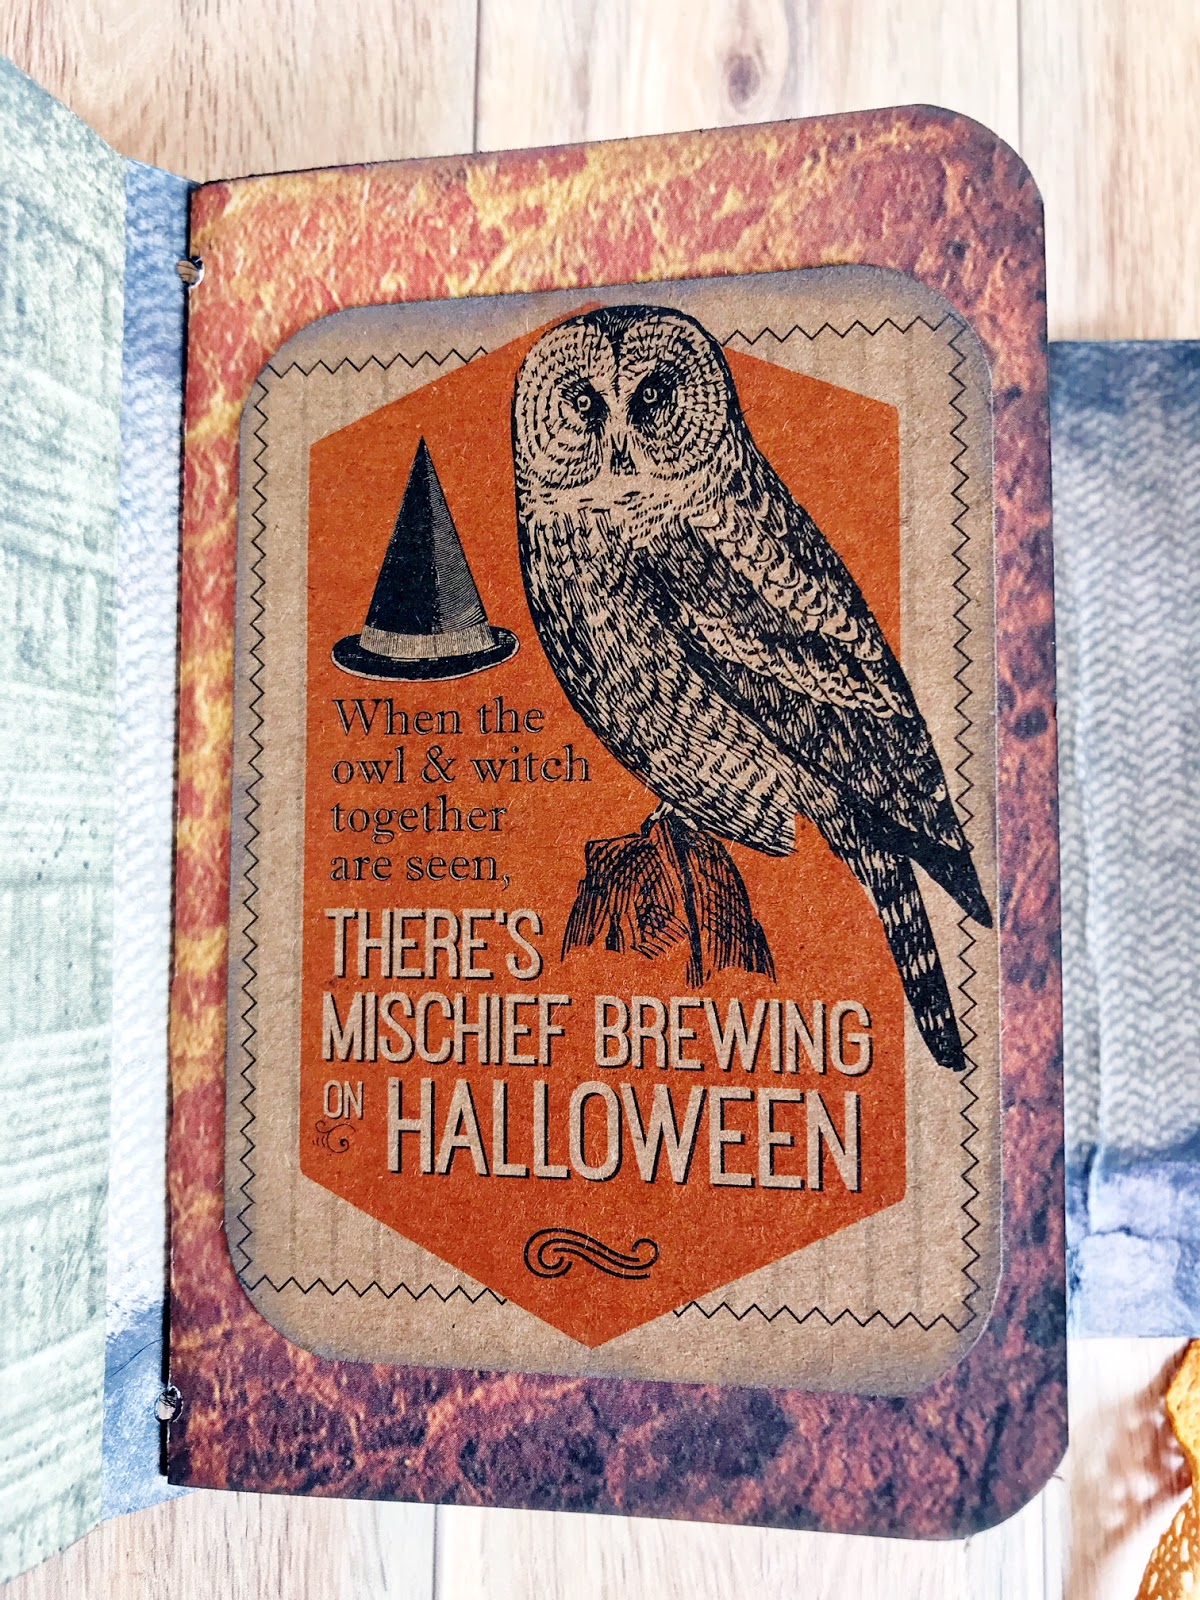
Today I'm using the awesome Wrap Journal die to create a Halloween Junk Journal, and I'm loving how this turned out!! I've included lots of photos so you can see all the details, but be sure to scroll down to see the video link where you can get a complete walk through and the blog hop line up below! I've also included a list of the supplies below as well.
I had a lot of fun layering paints, stencils, powders and stamps to create a spooky background. The Seth Apter paints were wonderful to work with and mixed beautifully to create even more colours than the four I worked with in the Autumn Set.
The Hammered Metal embossing powder created such a cool effect inside the EC skull stamp!
I added lots of fun elements along the spine of the journal.
Here's a look at the book opened up. I plan to fill this junk journal with lots of spooky Halloween ephemera!
I created a little tag pocket on the left and decided to tuck the right flap under the cover, but you can also choose to layer it over the top. The Magical Mysteries Dragon's Egg powder added a beautiful purple - complimenting Seth Apter's paints!
I created four 'signatures' which are the little booklets that fit into the Wrap Journal. I cut a cover from Tim Holtz cardstock and then three more pieces of paper from a 7gypsies Halloween collection sized at 6 1/2 x 5", which I folded in the center.
The Canvas Corp Halloween Tags on Kraft cut apart sheet was perfect to cut elements from to add to the notebooks and inside the journal.
I punched small holes with my Crop-o-dile to match up with the diecut holes in the journal and threaded a piece of hemp twine through the center of each signature and then the journal spine.
Some Ground Espresso Distress Oxide Ink added a shadow around the edges of my pages and I rounded the corners with the We R Memory Keepers corner punch at 1/2".
I used some more Tim Holtz cardstock to cover the inside base of the Wrap Journal, tearing a bit off the edges and adding more of Seth Apter's paint.
A few Tim Holtz' paper dolls and chit chat stickers are tucked in various places throughout the journal.
The spooky little outhouse was fun to add to the back of the journal along with a sticker from my Halloween stash.
To close the Wrap Journal I glued on two metal embellishments and added some ribbon coloured with Seth's paints. I really love the Autumn colours in this set!
I hope you enjoyed having a look at this journal - I really loved creating it!
Be sure to check out the process video where I show you how I create the cover of this journal and then do a walk through of all the fun elements I included!
Be sure to head over to the next stop on the hop - Jenny Marples to see her amazing project!!
Thanks so much for stopping by today!! I hope you find lots of inspiration and a few ideas for goodies on your wish list ;) Don't forget to leave a comment for a chance to win an amazing prize pack, and have a fabulous day friends!
Hi Friends! I hope you've been having a lovely week so far! I've had lots of fun creating projects lately and here's one more for you! It's time for the midweek inspiration for Challenge #125 Birthday over at the Kitty Bee Designs Challenge Blog - Aloha Friday!
Challenge #125
Super big thanks to our sponsor for this challenge
For my project I'm using the gorgeous Sunflower Cottage Collection from Nitwit Collections. They have amazing digital scrapbooking and cardmaking collections, and I thought the beautiful sunflowers and butterflies would make a perfect birthday card to go along with this week's challenge theme!
I used my Cricut Explore to print & cut the lovely elements in the kit and typed in the Happy Birthday in a scripty font.
I added some pretty Stickles and popped the wings of the butterflies up. Since they were printed on white cardstock they are stiff enough to keep their shape.
I used some Tattered Angels Glimmer Mists on the background and the white doily to add colour and shine to my card. Some SpiegelMom Scraps sequins add a few extra pops of colour. I just love the striped bag and the pretty flowers!
Inside, I stamped a sentiment from Pink & Main with gold embossing powder and added another diecut flower. I was really impressed at how well the Cricut Print & Cut option worked, but you could cut these out by hand if you like with a border too.
I was really pleased with how beautiful the printables were and love how everything coordinates. All I had to do was layer it all together!
Thanks so much for stopping by! Be sure to check out the Kitty Bee Designs Aloha Friday Challenge to see all the inspiration from the other awesome Design Team members - and enter your own project HERE for a chance to win!! Have a wonderful weekend!
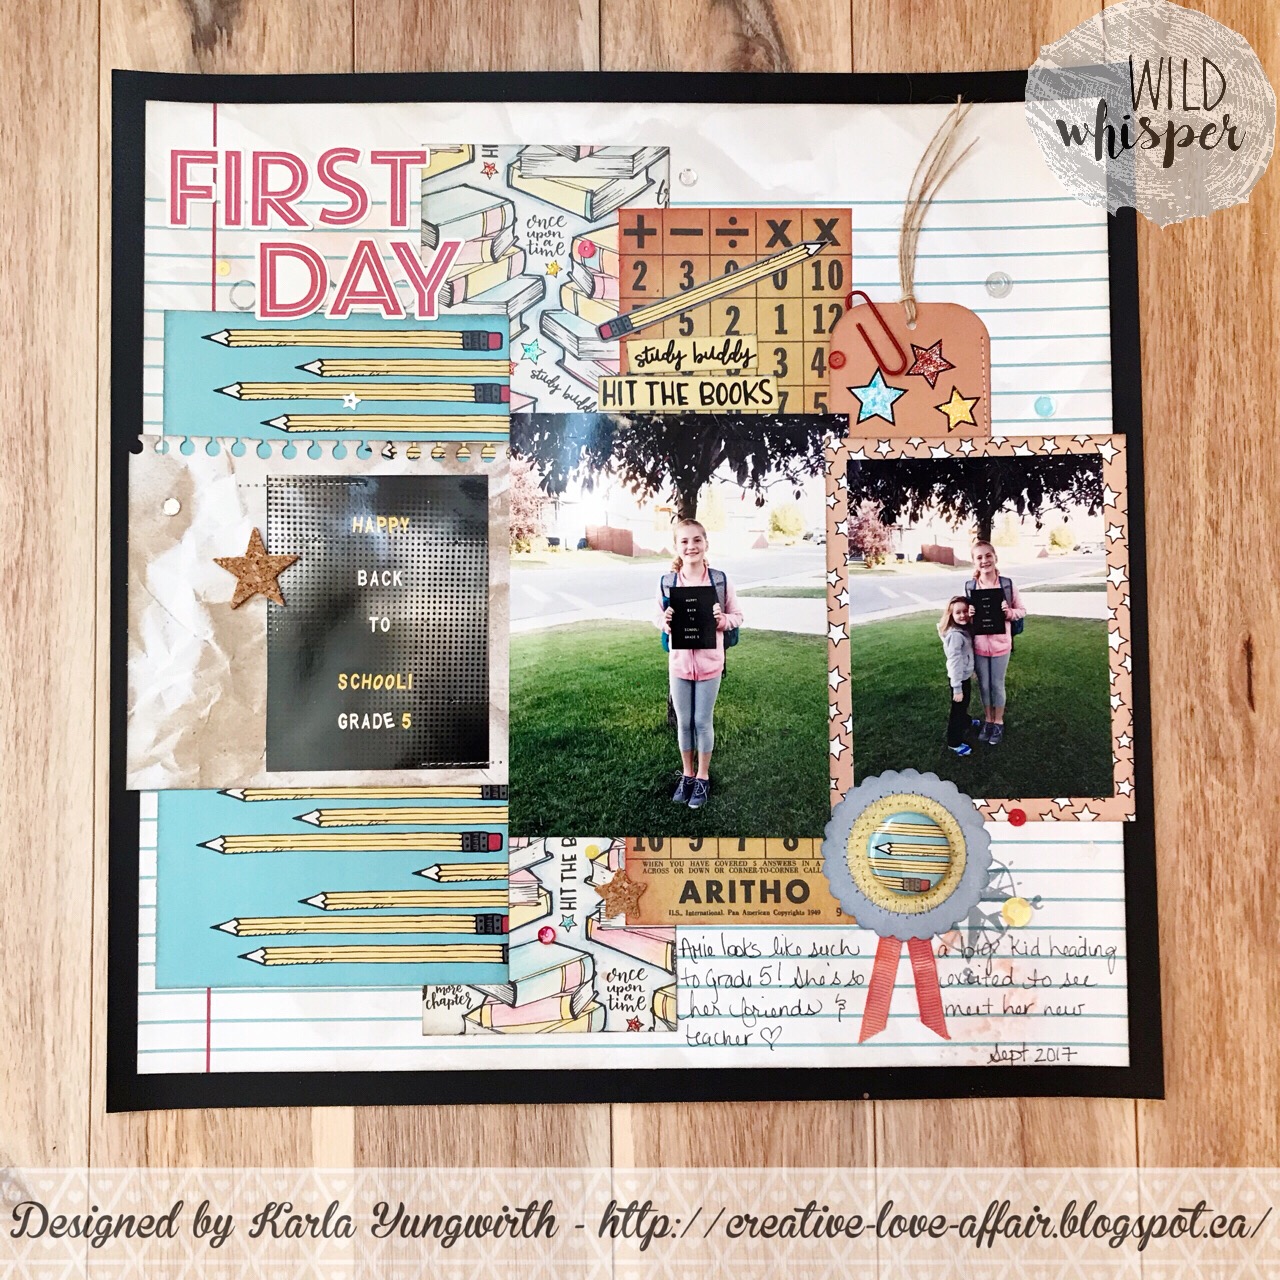
Hey friends!! I hope August has been fantastic for you all 💙I've enjoyed being home for the summer with my girls, spending lots of time playing, getting outside, and doing a bit of crafting. They head back to school soon, so of course we have been thinking about school shopping, fall and getting ready for the first big day back. This was the perfect opportunity to get out last fall's pics to do a layout about just that thing using the awesome new August collection from Wild Whisper - One More Chapter! I'm really excited to be guest designing for the Wild Whisper girls and this will be my second layout with this collection. If you didn't see my first layout where I use the library and book prints, be sure to check it out here!
Thanks so much for stopping by today! Be sure to head over to the Wild Whisper blog to get all the details and closeups on this layout, and have an awesome, craft week ahead!
Hi friends! I'm back today to share a sweet little birthday card with you using the adorable Kitty Bee Designs digi stamp! I don't usually do clean and simple, but today I really wanted to focus on this sweet little image and a Distress Oxide background, and I really do love how it turned out! I used blending foam and sponged on Tumbled Glass, Shaded Lilac and Spun Sugar in a diagonal pattern on Bristol Cardstock. It is a smooth cardstock that is thick enough to withstand some added water. I then spritzed with water and let dry partially before finishing with a heat gun. The Distress Oxides blend beautifully and react with water to create an instant cool background!
I used Prismacolor and Hobby Colour markers, both alcohol based, to colour in the image, which is printed on a 65lb white cardstock base. I then used a Kaisercraft stitched circle die to cut him out and added some white gel pen highlights.
I wrapped some white and purple baker's twine around the background and then layered the image over top, adding foam tape for dimension. I stamped the Lawn Fawn sentiment with purple Archival Ink and added some SpiegelMom Scraps sequins. (don't forget to use the code KARLA15 to save 15% off your purchases at the SMS shop!)
Inside, I added the rest of the sentiment and a few more sequins. If you do a simple Google or Pinterest search for 'laundry quotes' you'll find tons of sentiments you could use!
To qualify for the prize, be sure to use at least 1 Cricut cut on your project and if it's not obvious, let us know what cartridge you used. If you use a Cricut Explore machine, at least one cut must be from the Cricut catalog of images. If it isn't a card, you will get two entries into the drawing!
For this challenge I created a double page scrapbook layout using lots of Cricut cuts as well as SVG files from our fabulous sponsor, Printable Cuttable Creatables (see below for a list of files and cartridges used). I always like to check to see what's free each week in Cricut Design Space, and I really loved the Photo Play Paper Happy Glamper files, which were print and cut. I figured while I had my Explore hooked up to my printer I would flatten all the cuts I was using and print & cut them all at once. I love using diecut ephemera packs, so this was awesome - I could cut as many as I wanted and size them just so!
We take a yearly camping trip to a campground in Alberta with a bunch of other families, and it was so cool to look back on 2012 to see how little the girls were on this trip. I realized after I took photos that I forgot to add the date and some journaling, but I will go back and do that! I have these in an album with the rest of the trip that year, so there is already a lot of journaling, and well... it was a busy weekend so I decided not to retake photos!
The PCC Sandbucket file was coloured so nicely that it matched my colour scheme perfectly! I love the shadows that come with the cutfiles and make it look so nice if you decide to print & cut.
I pulled out an older My Mind's Eye collection, Jubilee, that I had in my stash and used the pretty papers together with some background papers from another stash. I used a bit of watercolour pencils to add colour to the black and white cardstock below. The printed sentiment banner was from the Cricut Photo Play cut and I added a cute pink flamingo from an Echo Park sticker pack.
I wanted to bring some of the same colours in the photo and papers to the top left corner so I used some Distress Oxides and Inks and a pretty Vicki Boutin butterfly stencil along with lovely matching SpiegelMom Scraps Sequins. (Be sure to use the code KARLA15 to save 15% off at the SMS Shop!)
I layered some of the diecuts and created a title, using some twine to add to the banner effect.
For the second layout I brought in some of the same papers and used the butterfly stencil again. I just love looking back and seeing how adorably cute Erica's little chubby legs were! And Amie is the same age in the photo as Erica is now! That's one of the most important reasons I love scrapbooking - remembering all those little things just makes me happy :)
The PCC castle turned out really neat, and I added some glittery gel pen to the window and flags. I love the Echo Park brad and the printed sentiment layered along with bottom of the page.
Another cute flamingo brings in some more pink colour to the layout, layered beside the PCC beach ball and wave.
I popped up the sunglasses with foam tape and added some Glossy Accents to the Sunny part of the diecut title. Adding the black gel pen around the edge of the title just helped it stand out on top of the yellow background.
Thanks so much for stopping by! Be sure to head over to the FCCB challenge blog to see what all the other fabulous designers came up with for this challenge, and enter your own project with at least one Cricut cut for a chance to win!