Sunday, November 27, 2016

With Sugar On Top Scrapbook Layout!

I hope all my US friends had a wonderful Thanksgiving Weekend! I had lots of fun playing in the 15 Minutes 2 Scrap with SpiegelMom Scraps this weekend. It is such a great community of creative, crafty girls, and one worth checking out! There were some awesome challenges and lots of inspiration going on as well as some great sales over at the SpiegelMom Scraps Store! I'll post a code below for the Cyber Monday Sale!

One of the challenges was to create an 8 1/2 x 11 layout using gold letters, a stencil, and mixed media. This was a bit of a challenge since I'm a 12 x 12 scrapbooker! But it was definitely fun, and I love how it turned out. I started off using a sketch from the October Sketchy Challenge on the Creative Scrapbooker Magazine website and adapted it to fit my page. Using an off white background I stenciled white snowflakes using a Dina Wakley stencil and white Ranger texture paste in three different clusters on my page and then splattered some pretty Christmas coloured mists on my page using Tattered Angels Mists in Sage and Wild Currant along with some Tim Holtz Mica Mist. I also used the Glimmer Mists to colour in the seam binding ribbon on my journaling tag.


I used the gumdrop stamps from the Pretty Cute Stamps Gingerbread House clear stamp set on some white cardstock that I had misted with the Glimmer Mists, as well as a couple sentiments - one stamped directly onto my photo. The diecuts are from the Winter Frolic Cricut cartridge, which was a free cut of the week. I created three distinct clustered areas on my layout with the stenciled areas, diecuts, stamps and sequins to create a visual triangle around my photos.

For the gold lettering element, I used Emerald Creek Charred Gold embossing powder on my diecut letters. This embossing powder is fantastic! I love the gold with pops of black in it.  I was so excited to recently pick up this embossing powder, Gold Confetti SpiegelMom Scraps sequins and amazing Holiday Style patterned papers from the new Canadian Wild Whisper Shop, and to use all these wonderful goodies on my layout! I had lots of fun using these pretty papers on my diecut images and fussy cutting out the pretty stars from one of the papers. I even added a bit of sugary Stickles to my letters for some extra detail.

Here's that code for the SpiegelMom Scraps Store if you feel like doing a little Cyber Monday shopping ;) 

Thanks so much for stopping by today! As December approaches we're looking forward to doing lots of Christmas activities and enjoying a happy Holiday season once again. I hope you had a wonderful weekend and have a creative and joyful week ahead!

Linked to:
Emerald Creek Dares - AG (You can get 10% off your order at the Emerald Creek Store just by entering!)
Lasting Memories December Challenge - Glitter and Glam
DL Art - Nov Linky Challenge
CHNC - #309 Use a Sentiment - Christmas themed
CHNC Challenge Extra - Nov Link Up AG Christmas
Little Scrap Pieces - Show It Off Saturday
PDE Linky Party - Anything But A Card
SSS Wednesday Challenge - Christmas To Die For (diecut & Christmas)
SSS Monday Challenge - Trio Tastic (3 clustered areas of embellishments)
DCD - AG
Creative Scrapbooker Magazine - October 2016 Sketch


Wednesday, November 23, 2016

Red Panda Christmas Cards!

Hi Crafty Friends!! I'm back today to share a couple of cute Christmas Cards I made using the adorable Special Delivery Red Panda Valentine Digital Stamp from Kitty Bee Designs. Even though this cutie is technically a Valentine stamp he could definitely be used for any type of Happy Mail! He was so sweet, I decided to colour up two and make a pair of similar layered cards.

I started off layering some patterned papers over prefolded card bases and using some Simple Stories Christmas journaling cards as a background layer. I then added the red deer sticker and added some hand drawn stitching lines using a black Smash pen.

I used Prismacolor and Hobby Colour Markers to colour in the Red Panda image. Whenever I'm not quite sure of exactly what colours to use when colouring in an image I just 'google' what I'm looking for as a cartoon and I can usually get an idea of how to colour it.
 
I added an ornament sticker over top of my popped up image and used some foam tape to give the top of it a bit of dimension. I added little bows to the top of the ornaments, glued in place with tacky glue.

I used sequins to finish off my cards - one of my favourite tricks to embellish with these days - from the Holly Berries, Wedding Bells and Gold Confetti Sequin Mixes from the SpiegelMom Scraps Store. You can pick up your own awesome embellishments at the store using the code LISA15 to save 15%!

If you're in Canada, you'll definitely want to check out the SMS Sequins that are available at the Wild Whisper Shop! This beautiful plaid paper that I've used as a background is from their Holiday Style collection and it is gorgeous!

Thanks so much for stopping by today! I hope you are getting some crafty time to make some holiday cards. Be sure to check out the Kitty Bee Designs Etsy store for this and other super cute stamp designs, and have a wonderful week!

Linked to:
DL Art - Nov Linky Challenge
CHNC - #308 Cute or AG Christmas
CHNC Challenge Extra - Nov Link Up AG Christmas
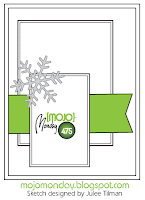
Mojo Monday - Sketch 475


Monday, November 21, 2016

Mouse Happy Birthday!

Hi there crafty friends! Well, the days are speeding by, and since I hate rushing around in the crowds I've been busy trying to organize Christmas stuff this month. I haven't done as much blogging lately as I'd like, but I did want to share this cute mouse birthday card from a party that Erica went to last month! This adorable little mouse holding a cupcake is the Mouse Birthday digital stamp from Pretty Cute Stamps. I printed her out on white cardstock and coloured her in with Prismacolor and Hobby Colour Markers.

I used my Cricut to cut out the scalloped circle and cut around the digi image with a circle cutter before layering the image on my background BoBunny papers. I use the PCS Birthday Elephant digital stamp for the presents, printing them in two different sizes and using two circle punches to cut them out. A little foam tape on some of the layers gives a bit of dimension.


Some pretty sequins from the SpiegelMom Scraps Store added the perfect birthday touch!

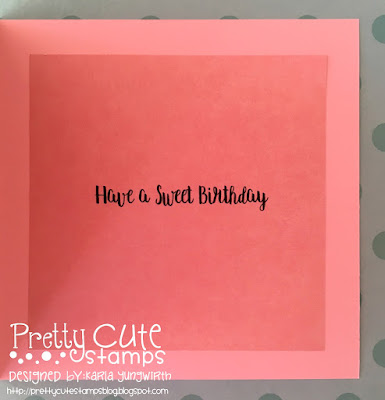
Inside, I used a sentiment from Mouse Birthday, printed directly onto my pink carstock.

Here's a look at these cute stamp sets:
Mouse Birthday

Birthday Elephant 

Thanks so much for stopping by today! I hope you've been enjoying some crafty fun lately as well as getting ready for any upcoming celebrations!

Linked to:
DL Art - Nov Linky Challenge
Little Scrap Pieces - Show It Off Saturday


Wednesday, November 16, 2016

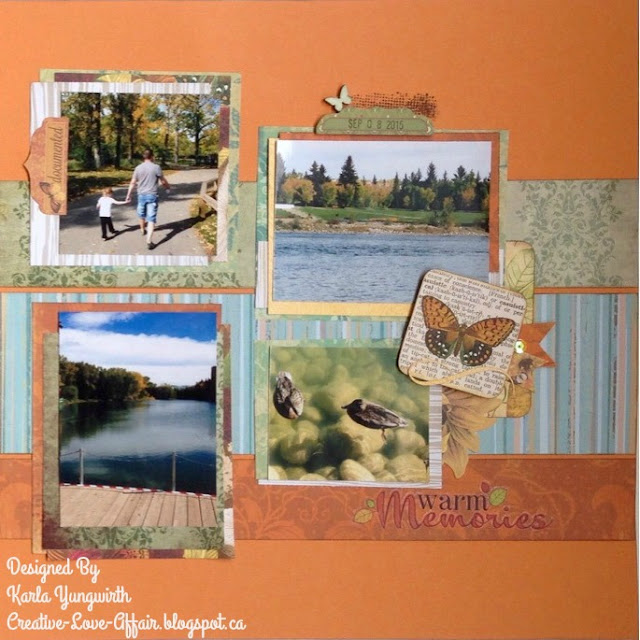
Happy Fall, Warm Memories Double Page Layout!

I feel like the past week has flown by! I've been busy getting together some Christmas cards for a couple swaps and making some baby gifts for my sister who's due to have a baby any day! I'll be sharing those in a couple weeks so I don't spoil the surprise ;).

I wanted to pop in quick to share a double page Fall layout I did though. As it is mid November, I'm finding my mind is on Christmas, but I don't want to let Fall pass by too quick! This is based upon a sketch by Kelly Klapstein in the Creative Scrapbooker Magazine Fall 2016 issue. I don't find myself doing too many double page layouts anymore, but I really do enjoy them. You can find the sketch here as well as Kelly's take on it, and the past sketches!


I used some pretty papers, stickers and cut aparts from the BoBunny Enchanted Harvest Collection as well as a few other papers and goodies from my stash.

I added a background stamp above my date tab and a pretty wooden butterfly that I coloured light blue.

Another wood flower and some sequins highlight my title.

Here's a look at each page separately:


Thanks so much for stopping by! I'd love to hear what you've been up to, and here's to a wonderful and crafty week!

Linked to:
The Clique Kit - Nov Challenge Link Up
PDE Linky Party - All Cards
DL Art - Nov Linky Challenge
Little Scrap Pieces - Show It Off Saturday


Friday, November 11, 2016

Kitty Bee Designs Challenge #84 - Fall Colours

Hi Friends! I hope you've been having a lovely week so far! I've had lots of fun creating Fall projects lately and here's one more for you!  It's time for the midweek inspiration for Challenge #84 over at the Kitty Bee Designs Challenge Blog - Aloha Friday!

Challenge #84 - Fall Colors

Super big thanks to our sponsor for this challenge, Bugaboo Stamps!


For my project today I'm using one of the super cute digi stamps from our wonderful sponsor Bugaboo Stamps - Autumn Kidz! After printing her out on white cardstock I used coloured pencils to colour her in. There is something so basic and relaxing about colouring with coloured pencils. I didn't use anything fancy - I just used the pencils my girls have in their colouring drawer!


I used a Basic Grey paper from the Highline collection for my background paper and layered it on each side of my gatefold card. I had a Heidi Swapp clear stamp in my stash which came with a steel die, so it was great to add this word bubble hello sentiment. 

I added some white, clear and sparkly gel pens to my project as well as some Glossy Accents. This squirrel in her hair cracks me up! The sequins are from the Autumn Joy Fall sequin mix from SpiegelMom Scraps.

Thanks so much for stopping by today! Be sure to head over to the Aloha Friday Kitty Bee Designs Challenge Blog to see all the awesome inspiration and enter your own Fall Colors project for a chance to win!

Linked to:
PDE Linky Party - All Cards
DL Art - Nov Linky Challenge


Tuesday, November 8, 2016

Guest Designer at SpiegelMom Scraps - My Girl and a Video!

Hey there crafty friends! I'm super excited to be Guest Designing today at the SpiegelMom Scraps Blog - what an honor! Today, I'm sharing a layout that I made of my youngest daughter, Erica, when she was just a year old. Wow - time flies - she's now almost 5!

I started off using a sketch from the Creative Scrapbooker Magazine website and layered papers and stickers from the Echo Park Petticoats and Pinstripes collection by Lori Whitlock. I just love these papers, and the pretty sequins from the Pinky Pie, Spring Blooms and Let's Be Mermaids Sequin Mixes from the SpiegelMom Scraps Shop were the perfect embellishments! I love using a sketch as a starting point, then choosing my photos, papers and embellishments.

These wonderful Cork Chevrons are so awesome for layering! I pulled out some paper ephemera diecuts from a My Mind's Eye All Things Girl package to add to my layout. I love the vintage feel of these diecuts!

I used the tiny silver stars from the Pinky Pie collection on this pretty crown, which I layered over a sticker from the EP collection pack. I added some handwritten journaling and stamped the date with an Amy Tan date stamp. I love that a lot of the paper packs come with coordinated journaling cards in them. Even if I choose not to use them in a pocket page, they are great to use on a layout!

These sweet little flower sequins in the Pinky Pie Sequin Mix were just perfect to layer on the flower sticker. They are subtle and add a pretty shine! You can see some of the stitching that I added across my page. Erica was very excited to #1 - have another layout of her own baby pics and #2 - help me with the stitching!

I've created a video for you to see my process over at YouTube. You can click here or watch below.

Here's a look at the beautiful embellishments I used on my layout, which you can find at the SpiegelMom Scraps Shop:
Let's Be Mermaids

Pinky Pie

Spring Blooms
Cork Chevrons

Thank you so much for stopping by today! Be sure to check out the SpiegelMom Scraps Blog, where you can find tons of amazing crafty inspiration, and the SpiegelMom Scraps Shop for awesome embellishments to add to all your projects! Use the code LISA15 to save 15% off!!

Have a wonderful week!

Linked to:
Creative Scrapbooker Magazine - November Sketchy challenge

Sunny Day Crafting - AG
PDE Linky Party - Anything Goes
DL Art - Nov Linky Challenge
Crafty Hazelnut's Patterned Paper - Nov Link Up


Monday, November 7, 2016

FCCB #289 - Autumn

 Happy Monday and welcome to another Monday challenge!


Challenge #289-Autumn
Make a project with an autumn theme.

This Weeks Sponsor
DL.ART logo with web address photo Capture DL logo with web address._zpsfl4kkzhr.jpg


And we are giving away a $25 Amazon gift certificate, courtesy of FCCB Design Team! This prize will be given if there are 10 entries or more. 

To qualify for the prize, be sure to use at least 1 Cricut cut on your project and if it's not obvious, let us know what cartridge you used. If you use a Cricut Explore machine, at least one cut must be from the Cricut catalog of images.

For my project today I made a pretty Fall card using the Tablescapes Fall and Winter Cricut Cartridge, which was the Free Cut Of The Week last week. For some reason I had never before figured out how to access the free cartridge! So unless I came across it in my searches or saw an email and then remembered to look for it, I just never used it. It's so easy, so just in case you aren't aware of how to access it easily in Design Space here are the instructions: 1) Open Design Space, and open a new project. 2) Click Insert Image. 3) On the top right of the screen click 'Categories' and there will be the Free This Week option! 

I used the pretty Accent Flourish cut behind my Bugaboo Stamps digital image Autumn Critters, which I coloured in with coloured pencils before popping up with foam dots to add some dimension. The lovely fall paper is an old paper pack by imaginisce - I love the colours in it!

I was quite excited to cut these pretty leaves and feathers and really liked how the cuts in the centers looked darker after I shaded them with Distress Inks. I grabbed my Tim Holtz Mica Sprays and spritzed the three different colours on the diecuts. I love the sparkly mist these sprays add - and I love how the mica spray reacts with the inks!


I used a circle Hello stamp and punched it out with 1" circle punch, adding some Distress Inks around the edge. Some white, clear and sparkle gel pens add details to the sentiment and stamped image. Lastly, I added some beautiful sequins from the Autumn Joy Sequin Mix from SpiegelMom Scraps. 

Inside, I used another diecut leaf layered over a white insert, ready for whatever sentiment is needed!

Thanks so much for stopping by today! Be sure to head over to the Fantabulous Cricut Challenge Blog to see what all the other Design Team members have come up with for this challenge - and enter your own for a chance to win!