Tuesday, May 31, 2016

Emboss Resist and Color Burst Card!

Hey crafty friends! Hope you all had a lovely weekend and the week has started off great :) Today I'm sharing a card I made using the Emboss Resist technique. It's like magic every time I do it!

I started out by taking a stamp and inking it with Versamark Ink. After stamping on watercolor paper I heat embossed it with white embossing powder. I tapped my Color Burst powders directly onto my craft mat before spritzing with water to make an intense watercolour palette and then painted them directly onto the watercolor background. So easy!!


I added some bakers twine around a metal embellishment and added some sequins from 28 Lilac Lane to finish it off.

Thanks so much for joining me today! I hope you're inspired to get out whatever watercolor medium you have and apply it to an embossed background. See what fun you can have!


Thursday, May 26, 2016

PDE Friday Linky Party - With Sympathy Card!

Today I'm posting for the PDE Linky Party Blog where it's always Anything Goes!


For my project this week I created a Sympathy card using Cricut diecuts and my Cricut Explore. I love using patterned paper on diecuts - even papers that I normally wouldn't use as a background seem to make my diecuts pop! A good way to use your stash :)

This feather diecut came from the Cricut Bits and Pieces cartridge - there are so many awesome cuts on this one! I used one of the fonts in Design Space for my sentiment and welded the letters together before cutting them out. If I can't find a sentiment within the available images that I'm looking for I will usually do this so I don't have to place each letter on individually. By cutting it out of a paper with a script in the background it gives it some interest without being hard to read.

Thanks so much for joining me today! I hope you have a lovely weekend and join us over at the PDE Linky Party blog for more inspiration!


Wednesday, May 25, 2016

Pretty Cute Stamps Design Team Call!

If you haven't heard, Pretty Cute Stamps is having a Design Team call! To check out this awesome opportunity go to http://prettycutestampsblog.blogspot.ca/2016/05/pcs-design-team-calllooking-for-digital.html 


This is a wonderful company to work with! 

Have a crafty week!

Karla <3

Tuesday, May 24, 2016

Grandma Mar Layout using Fancy Free and Cut Files!

I love this sweet photo of my daughter snuggled up with her grandma. We don't get to see her too often, so the time spent with Grandma Mar is precious.

I used the April sketch from the Creative Scrapbooker Magazine along with this Shattered Glass Overlay FREE cut file from the Bits and Pieces Lab blog as the base for my layout. Of course the wonderful Fancy Free papers by Pink Paislee were perfect behind my photo and the cut file. I love how the papers match my photo!

 The hearts from the ephemera package matched the papers I used, so I placed them inside the cut file openings after using foam dots to pop up my photo to add a little dimension.

I used my Cricut Explore to also cut the title before adding a graduated layer of Distress Inks in Twisted Citron and Lucky Clover.

It was easy to fussy cut some of the flowers and circles from the paper pad and layer them on the bottom corner of my page before adding a clear embellishment.

Thanks so much for stopping by today! I hope your week is filled with lots of happiness :)

Linked to:
Lasting Memories Layout Challenges - Only 1 photo
Creative Scrapbooker Magazine - April 2016 Sketchy Challenge

Monday, May 23, 2016

FCCB #277 and Pretty Cute Stamps -It's All About Pets!

 Happy Monday and welcome to another Fantabulous Cricut Monday challenge!


Challenge #277-It's all about Pets
Make a project about any animal that is a pet.

This Weeks Sponsor


Dreaming Tree SVG's

There will be three $20 Gift Certificates!

To qualify for the prize, be sure to use at least 1 Cricut cut on your project and if it's not obvious, let us know what cartridge you used. If you use a Cricut Explore machine, at least one cut must be from the Cricut catalog of images.

If it isn't a card, you will get two entries into the drawing!

For my project this week I used the Nate's ABC's (the puppy) and the CTMH Artistry (the heart paw print) Cricut cartridges to make this cute little doggy birthday card. I used various scraps of cardstock and patterned paper for each cut. I love using scraps from my 6x6 paper pads with my Cricut!

I'm also posting over at the Pretty Cute Stamps blog and thought this was the perfect opportunity to use the Fur Baby stamp set! I heat embossed a cute sentiment on the little wagon and added a sweet little paw print stamp with Distress Ink.  

I used a bit of red Distress Ink to sponge around the edge of my heart paw print and added a background of ombre paper underneath before popping it up with foam dots.

Inside, I added two more sentiments and a couple more paw prints from the Pretty Cute Stamps Fur Baby set. This set has so many amazing sentiments, for so many occasions, whether you're a cat or dog person! I used the negative cuts from the heart paw print inside as well. 

Here's a look at this adorable stamp set!
Fur Baby

Thanks so much for joining me today! Be sure to check out the FCCB blog to see what all the other Designers have come up with as well as the Pretty Cute Stamps blog for lots more inky inspiration! And, of course, have a happy, crafty week! 


Friday, May 20, 2016

Pretty Cute Stamps May Challenge - Just For Him!

Hey there crafty friends! I'm so excited about using the digital stamps that Pretty Cute Stamps have recently released!! They are sooo adorable - and there are so many awesome things you can do with the PCS digi stamps - resize to whatever size you wish, add cute faces from one set into another, print images with words inside, and make a sheet of images to quickly reprint anytime you want!

This month our challenge theme is 'Just For Him', and with Father's Day just around the corner this is just the inspiration to get those cards complete! You can use your clear Pretty Cute Stamps as well as the new Digital Stamps released this month. Lots of options - and a chance to win a gift certificate!


For my card I decided to use the digital images included in the Wooden SignLight My Fire, and S'mores digital stamp sets. After I printed them on white cardstock I coloured with my Prismacolor and Hobby Color Markers, which are alcohol based. I layered my images on some camping papers in my stash - I love this star background paper!

To make the marshmallows puff up I used some Liquid Applique and added a bit of heat with my heat gun - perfectly toasted ;)

Inside, I used a sentiment from the Such A Tool clear stamp set and added an arrow from the Wooden Sign digital stamp. I'm loving my circle punches for creating little layers lately!

A little grass diecut with my Cricut and a circle punched arrow from the Wooden Sign set completed my scene, and some Stickles on the fire and a sparkly dot made using my hot glue gun and silver glue adds some shine.

Here's a look at the stamp sets I've used:

S'mores 

Wooden Sign

Light My Fire

Such A Tool
Thanks so much for joining me today! Be sure to head over to the Pretty Cute Stamps blog to see what all the other amazing Design Team members have come up with for this challenge - and enter your own here using a Pretty Cute Stamp for a chance to win! Have a really awesome weekend :)


This Is Everything and Born To Ride Layouts using Fancy Free!

I am having way too much fun using the Fancy Free papers designed by Paige Evans for Pink Paislee! Here are two more layouts I've put together in the last couple days with photos from a camping trip I had printed as 5x7's a while ago. My daughter, Amie was 4 here - and now she's 9 - I can't believe how time flies. My youngest, Erica is now 4 and it's interesting to see how they are similar and different. This is one of my favourite reasons for scrapbooking - reminiscing about older photos and the fond memories they bring back!

For the first one I used this amazing butterfly cut file from The Cut Shoppe - you can find it FREE here on their blog post. They really do have amazing cut files! I backed it with paper from the Fancy Free collection - I love how the multicolour paper looks behind this cut file!

Here's a close up of this butterfly - so fun! I cut it large, but I think I'll do a few more smaller sized ones for cards. I used pop dots to add some dimension. 

The title is a cut file by Crafty Jen Schow - included with the Ready, Sketch, Go class. I used Prismacolor and Hobby Color Markers to colour my title and add a bit of shading.

Some Distress Ink coloured my wooden flower embellishment and I added a round puffy sticker dot to the center. I added some hand stitching using embroidery floss around my page by first piercing the paper and then stitching with a large needle and the floss.

The second layout was inspired by the May Sketch (below) over at the Scraproom Blog and the 
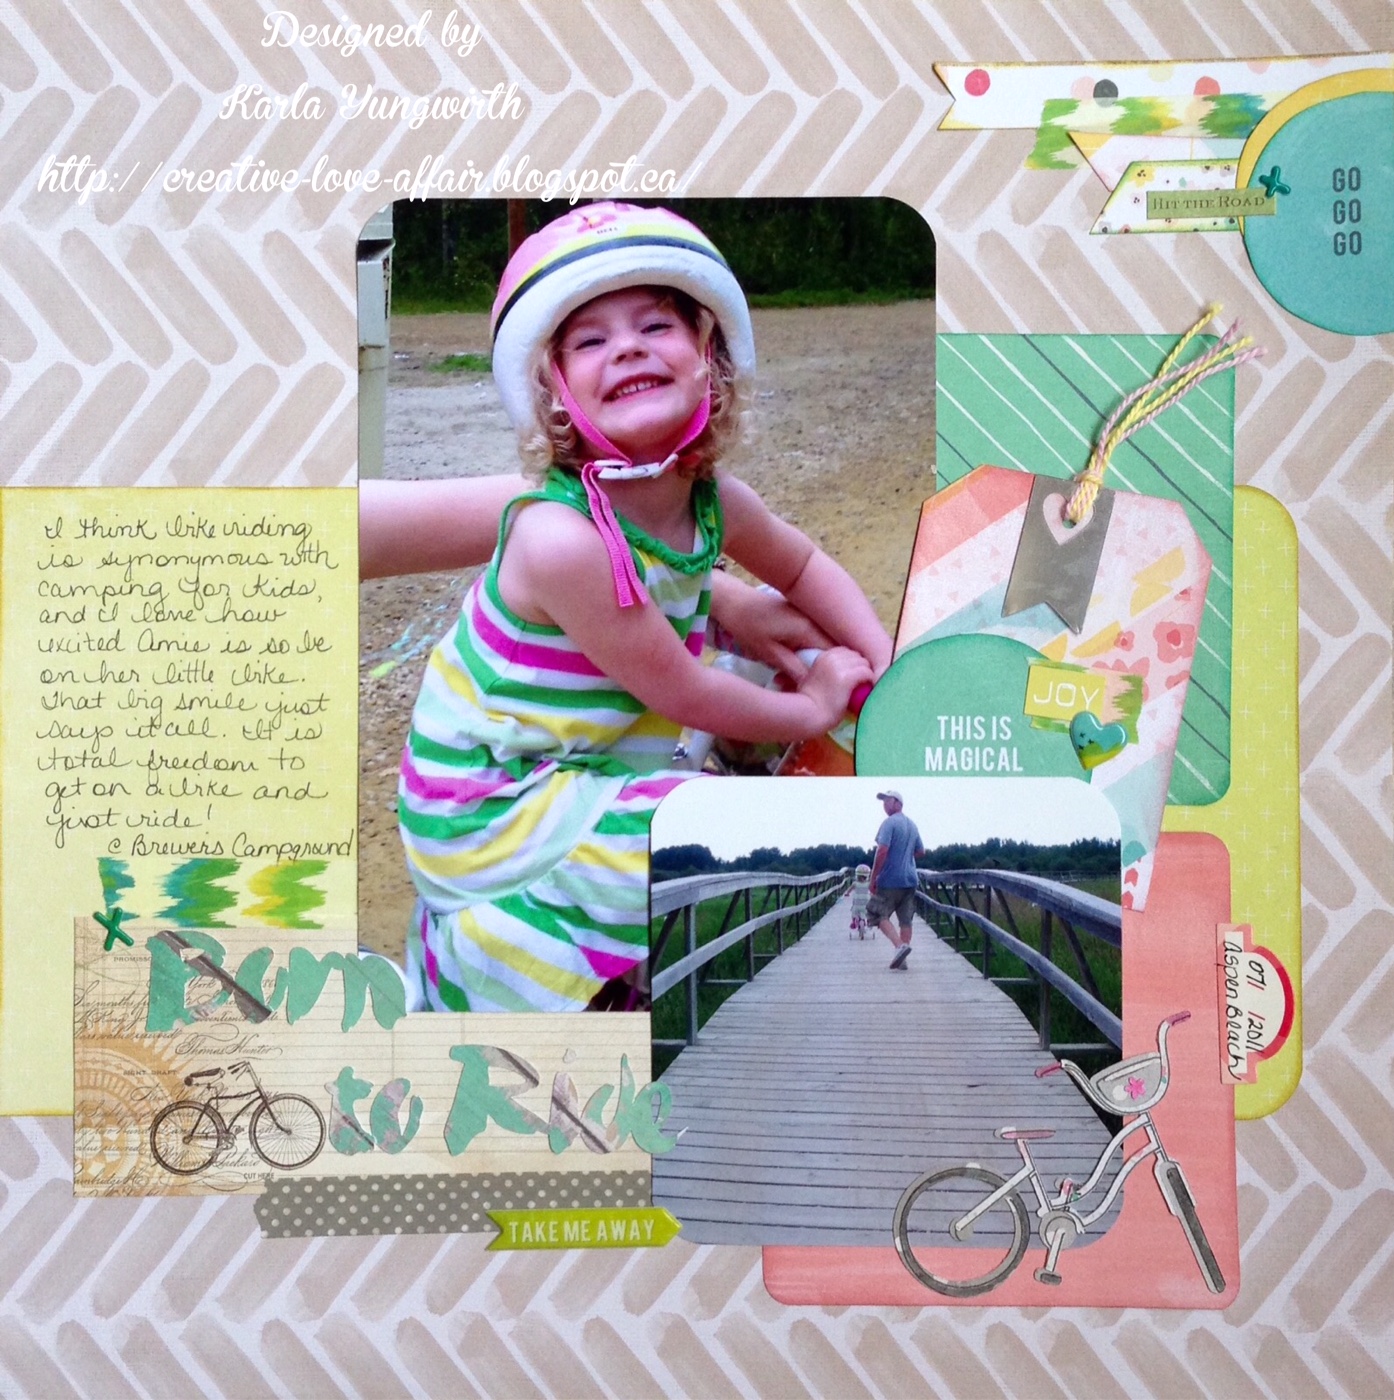
Die Cuttin' Divas challenge this week to use a bike. Everytime I look through the Fancy Free paper pad I see another paper I just have to use!

I used layers of paper strips and washi with stickers and some circles cut from the paper pad to create a layer of embellishments. Some more of that pretty embroidery floss is tied through my tag.

This cute bike is cut from the Cricut Spring Fling cartridge. I used papers from my 6x6 Maggie Holmes Crate Paper pad to cut it and coloured in parts with Distress Markers. A cluster of embellishments, washi and papers finish off my tag that I tucked in between the photos.

I wrote my journaling on the background strip and added a title 'Born To Ride' which I cut from a font in Cricut Design Space.

Thanks so much for joining me today! I hope you get some crafty time for yourself this weekend. It's a long weekend for us, but supposed to rain, so I will probably have to do a bit more scrapbooking ;)!

Linked to:
The Scraproom Blog - May Sketch Challenge using the right side of the layout
Die Cuttin' Divas - #266 Bike Month (bike cut from Spring Fling Cricut Cart)


Wednesday, May 18, 2016

Darling Layout using Fancy Free!

I am just so excited to have been able to get the Fancy Free papers and a couple items from Paige Evan's new collection with Pink Paislee! Being in Canada, it hasn't been the easiest to be able to get. These papers are absolutely beautiful - and I love the pretty ephemera and stickers! I put this layout together using a sketch from The Scraproom Blog - I just came across this blog today and since I was feeling so inspired by the lovely Fancy Free papers I decided make this layout using a photo of my daughter when she 3 and join the 'May Be Our Guest Sketch Challenge'!

The background paper is a graduated blue paper with painted brushstrokes from the collection - so pretty! I just followed the sketch and layered on the papers and photo. I used my paper piercing tool to make holes in my paper and added some cross-stitch and zigzag stitches with embroidery thread. A few puffy stickers (love!) added around the page adds interest and fun.

I coloured the 'darling' wood piece with some Distress Ink and layered it over my tags and papers. This puffy flower sticker is sooo cute!

So excited to create much more with these fun supplies!

The Scraproom Blog
Thanks so much for joining me today! I hope you have a lovely, crafty week!


Tuesday, May 17, 2016

DIY Scrapbook Tag Embellishments!

Hi Friends! I hope you all had a wonderful weekend! It was nice enough out here that we got out and took the girls for a little bike ride to the park. They made birdhouses at the local Home Depot kid's craft event and my 9 year old went to a Petland birthday party where she held a tarantula... yikes! My favourite thing was making these cute DIY tags :) I've been watching lots of YouTube videos on making your own scrapbook embellishments lately and thought I'd give it a try.

I pulled out a sheet of BoBunny Sweet Life paper from a 6x6" paper pad and cut it into 6 tags, each measuring 2x3". I rounded the tops of the corners with my We R Memory Keepers corner punch and sponged Victorian Velvet Distress Ink on the edge. I used a circle punch to punch out a circle of coordinating paper and, after gluing it to the top of my tag, hole punched through both layers so that it looked like I had reinforced the tag hole. I have lots of little scraps of paper, especially longer border strips that I was able to cut into banners and layer on my tags.


My circle punches worked to punch little pieces of leftover papers from my 6x6" pads and, together with some fun rectangles cut from an older Simple Stories pad, as well as some Tim Holtz Chitchat stickers, I was able to create some pretty tags and use up supplies at the same time!

I tied some embroidery floss through my tag and added some homemade 'enamel dots' that I made with a sparkly silver gluestick and my hot glue gun. The Ranger craft sheet is excellent for making these on!

Thanks so much for stopping by today! I hope this gives you some ideas to use your scrapbook supplies in a creative way :) Have an awesome crafty week!