Showing posts with label Heidi Swapp. Show all posts

Wednesday, July 3, 2019

Family Photo Layout!

Hello! I'm back today to share another layout using the awesome Scrap Shotz June 2019 Scrapbook Kit and available Add-Ons featuring the Heidi Swapp Wolf Pack Collection on the Scrap Shotz Blog. This is the fourth layout I've done using this kit and I still have so much more left over that I can play with! Today, I'm sharing a Fall family photo - and you can see how lovely this collection goes with Fall pictures too. The wood and nature elements make a wonderful background for any outdoor photos.


Thanks so much for stopping by! Be sure to head over to the Scrap Shotz Blog to see closeups and my process to create this page. If you are one of my US friends, I hope you have a fantastic 4th of July celebration tomorrow! Stay crafty friends.


Monday, July 1, 2019

Be Wild & Free Layout!

Hello and Happy Canada Day to my Canadian friends!! We are celebrating today with a BBQ and some fun festivities put on by the city. I'm also over on the Scrap Shotz Blog today sharing a layout using the Scrap Shotz June 2019 Scrapbook Kit and available Add-Ons featuring the Heidi Swapp Wolf Pack Collection. I love the nature feel of this collection - I just want to get outside when I see it! I have some more photos of my girls at a local park and this time I really wanted to incorporate the purples in the photos, so I used some Distress Oxides and a Studio Katia stencil to bring the colour out.


Thanks so much for stopping by! Be sure to head over to the Scrap Shotz Blog to see my step by step process and closeups. If you're celebrating this week, I hope you have a wonderful time!!

Linked to:


Wednesday, June 19, 2019

Explore Nature Layout!

Hello! I hope you've all been having a wonderful week. I'm over on the Scrap Shotz Blog today to share a layout using the new June Scrapbook Kit featuring the Heidi Swapp Wolf Pack collection. I used a sketch from the SCT365-2019 Layout Online Class as a starting point and had lots of fun layering goodies from the kit and photos of a fun hike at a local park.


Thanks so much for stopping by! If you missed the Kit Reveal video, you can check out this post HERE, and be sure to head over to the Scrap Shotz Blog to see my process to create this page. Have an awesome week friends!


Monday, June 17, 2019

Unboxing the Scrap Shotz June Scrapbook Kit!

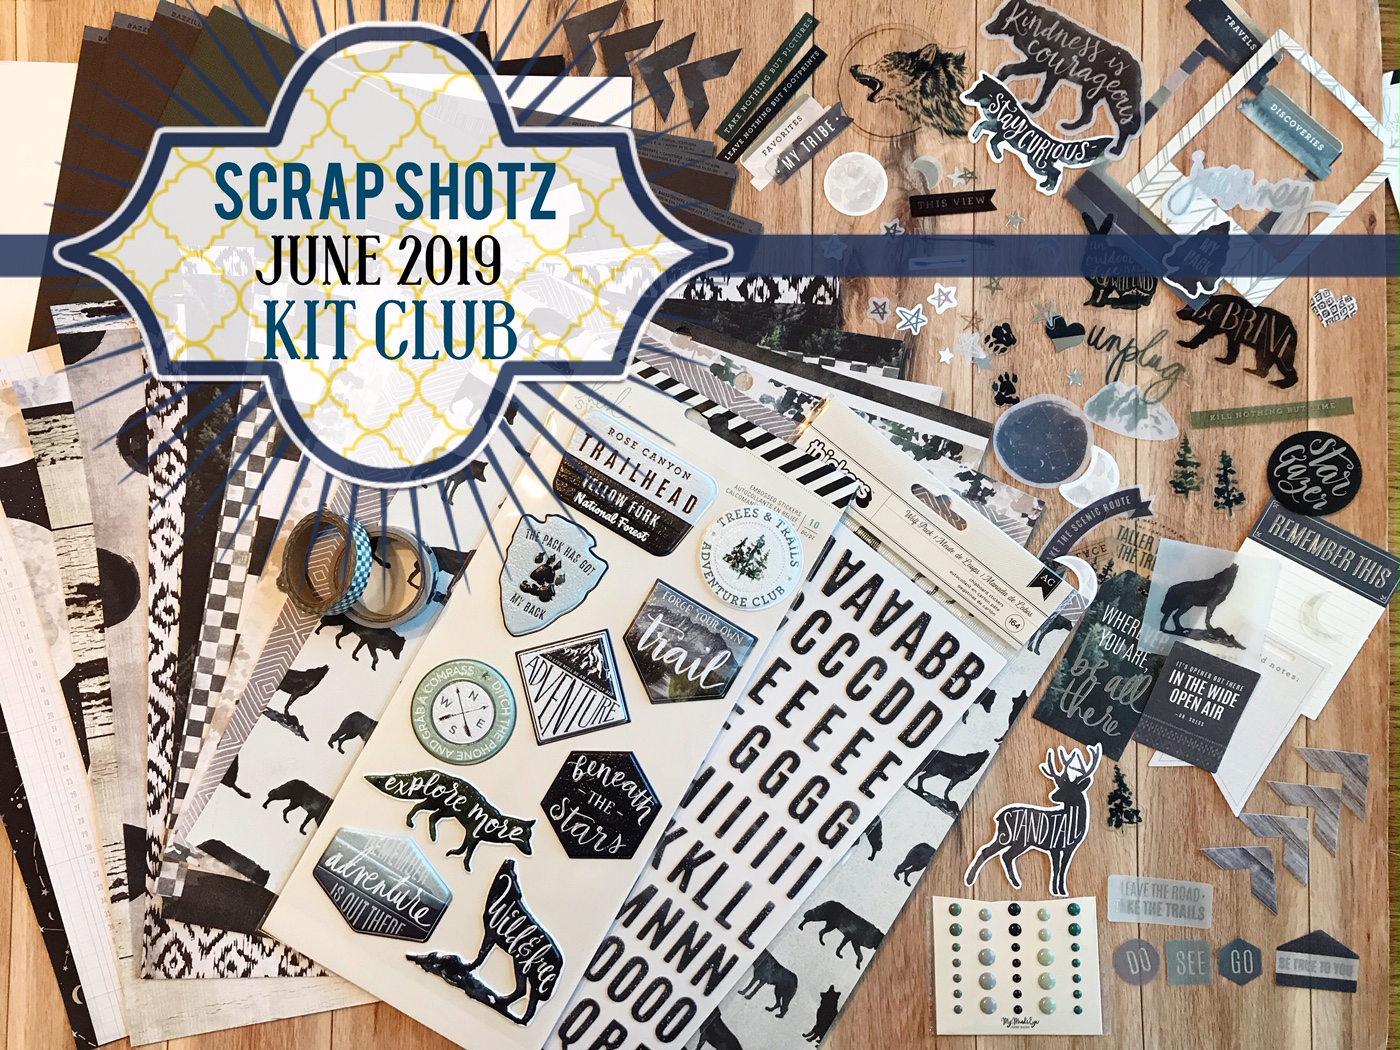
Hey there friends! Hope you all had a wonderful weekend, and that anyone who celebrated special dads in their lives enjoyed a lovely Sunday. We spent part of the day at a local amusement park in Calgary - Calaway Park and the girls enjoyed rides and treats while we enjoyed the sunshine! Today, I'm over on the Scrap Shotz Blog sharing a look at the fabulous Scrap Shotz June Kit featuring the Heidi Swapp Wolf Pack collection. Let me tell you, it's gorgeous!! Here's a look at the kit and below you'll find a video giving you lots of closeup views.


You can click here to see the video or watch below.

Thanks so much for stopping by! Be sure to check out full details on this kit at the Scrap Shotz Blog. You can find the new June 2019 Kit and Add-On's in the shop while supplies last. I'll be back on Wednesday with a project using lots of these wonderful supplies - so until then have a very crafty week!


Friday, November 11, 2016

Kitty Bee Designs Challenge #84 - Fall Colours

Hi Friends! I hope you've been having a lovely week so far! I've had lots of fun creating Fall projects lately and here's one more for you!  It's time for the midweek inspiration for Challenge #84 over at the Kitty Bee Designs Challenge Blog - Aloha Friday!

Challenge #84 - Fall Colors

Super big thanks to our sponsor for this challenge, Bugaboo Stamps!


For my project today I'm using one of the super cute digi stamps from our wonderful sponsor Bugaboo Stamps - Autumn Kidz! After printing her out on white cardstock I used coloured pencils to colour her in. There is something so basic and relaxing about colouring with coloured pencils. I didn't use anything fancy - I just used the pencils my girls have in their colouring drawer!


I used a Basic Grey paper from the Highline collection for my background paper and layered it on each side of my gatefold card. I had a Heidi Swapp clear stamp in my stash which came with a steel die, so it was great to add this word bubble hello sentiment. 

I added some white, clear and sparkly gel pens to my project as well as some Glossy Accents. This squirrel in her hair cracks me up! The sequins are from the Autumn Joy Fall sequin mix from SpiegelMom Scraps.

Thanks so much for stopping by today! Be sure to head over to the Aloha Friday Kitty Bee Designs Challenge Blog to see all the awesome inspiration and enter your own Fall Colors project for a chance to win!

Linked to:
PDE Linky Party - All Cards
DL Art - Nov Linky Challenge


Thursday, July 7, 2016

Flip Book Fun - Have a Magical Day!

I have been seeing so many Flip Book tutorials lately on YouTube and thought I'd try one out for a swap! It was so much fun I'm definitely going to have to try it again! I used Project Life cards from the Bloom collection to create my book, bound with Heidi Swapp washi tape.
These adorable little Lawn Fawn fairy stamps were so cute, and I thought they'd work with the flower theme. I even added some stamped and cut out images to the little Just For You pocket for my friend! These are great to use up lots of little bitty pieces of goodness in your paper collection. I added some stamps from the Believe Script stamp set by Pink and Main.
Here's a look at the book opened up inside:

And the flap on the left folded over:

Thanks so much for joining me today! Hope you have a lovely, crafty weekend!


Tuesday, February 23, 2016

Distress Crayon Tutorial!

I'm posting over at the Scrapendipity Way Of Life blog today, and since I picked up the Most Awesome Distress Crayons from Selena's truck last week I just had to share how I made this card with them!


I started off by taking a piece of Specialty Stamping paper, which is a little glossy and helped me move the crayons around a bit, but you could use a piece of white cardstock as well. I found some Heidi Swapp stencils and for the polka dots and hexagons I rubbed the crayon directly through the stencil. I rubbed a bit of the other crayons on the white areas and smudged it with my finger. Then, I took a baby wipe and wiped through the stencils to create a negative effect.

I used one of the crayons to edge around the piece of cardstock and then gently smudged it with my finger to blend it around the edge. I used my new Hero Arts Neon Ombre ink pad to stamp on these Tim Holtz butterflies and then shook on some clear Crystal embossing powder, which has a bit of shimmer in it. Another Tim Holtz sentiment stamp added detail to the front of the my piece, stamped in grey Archival Ink.

 Here's a close up of the finished piece. I added a bit of Pink Distress Marker inside the butterflies and a couple pink flowers at the bottom. I used the Distress Crayons to add colour to my seam binding ribbon, which Selena can get in by the roll! This is really my favourite ribbon. After rubbing it on I sprayed it with water and then rubbed it with my finger to blend it. The crayons don't automatically blend with water like the inks, but do blend when you manipulate them.

Thank you so much for joining me today! Have a fun and crafty week!

Linked to:
Simon Says Stamp Wednesday Challenge - Shake It Up (embossing powder)
Word Art Wednesday - AG
DL Art - Thankful Thursday February Linky Challenge


Sunday, November 29, 2015

One Sheet Projects with Pretty Cute Stamps!

I sure hope all of my US friends had a wonderful Thanksgiving weekend! We put up our tree and decorated for Christmas on Friday while we listened to Christmas music and had some very yummy snacks!

I'm sharing these cute cards and boxes today on the Pretty Cute Stamps blog, and I wanted to let you know how I made them. I've been using a lot of the Heidi Swapp Believe paper this year and have also been enjoying the One Sheet Wonder video instructions by Angie at My Chic'n Scratch. I love that you can take one sheet of patterned paper and some cardstock to create all these projects!!

I used the sentiments from the Nativity 1 and Nativity 2 stamp sets, as well as one on the inside of my card (bottom photo) from the Oh, Christmas Tree set, by Pretty Cute Stamps as my focal images. They are beautiful sentiments and are printed in wonderful fonts. I absolutely love these adorable images, but I really wanted to focus on these amazing sentiments this time! I dug through my stash of diecuts and even used my Cricut to cut some circles with coordinating scalloped edge frames to stamp on. 

I love these cute little folded bags! The video link above shows you how to cut and fold all the pieces using just a scoring board and cutter. I love how CAS the cards are and even though I usually struggle with that style of card I am really happy with how they turned out. I think the sentiments really show up using these layouts. Below each card (bottom row) I've shown the coordinating inside sentiment.

Thanks so much for joining me today! Don't forget to check out our Gift Giving Challenge at the Pretty Cute Stamps blog this month and you could win yourself a fabulous gift certificate!

Linked to:
CHNC Patterned Paper Challenge - November Link Up
DL Art - Thankful Thursday November Challenge - AG
Crafty Hazelnuts Christmas Challenge - #257 - Use A diecut/punch


Tuesday, November 24, 2015

Gingerbread Christmas Cards!

Well, I think it's that time! Christmas is really not that far away, so I want to get my Christmas cards done in the next couple weeks so I can use December to make some crafts and gifts and do lots of holiday activities with the kids.

I was inspired by some cards Angie at My Chic'n Scratch made using one sheet of patterned paper to create four cards and a cute little gift box! You add in your own cardstock for the base of the cards. I created a different focal image on the front of mine, but used her directions to make the bases for my cards and box.

After I covered the card bases with Believe paper from Heidi Swapp I used my Cricut Explore to cut these sweet gingerbread cutouts from the Cricut Gingerbread cartridge. I used coloured pencils to colour in some of the areas of my cookies and then used Glossy Accents to add a shine over top. Some Stickles on my wreath and trees add some more shimmer!

I used the inner cuts from the tree to create a tag cut from kraft cardstock. A couple stripes of this fun Christmas paper and a bit of candy cane twine give it a festive look tied to this quick and easy box.


Here's a close up of all four cards:

Thanks so much for joining me today! Don't forget to stop by the Scrapendipity blog to see what's happening over there!

Linked to:
Die Cuttin' Divas - #243 Tag, Bag or Box (my tag with diecut Christmas Tree)
CHNC Patterned Paper Challenge - November Link Up
DL Art - Thankful Thursday November Challenge - AG


Thursday, November 5, 2015

Christmas Cards with Heidi Swapp Journaling Cards!

Hi there! I hope you've all been having a lovely and a bit crafty week! I had a Christmas card swap recently that I needed to mail a set of 6 cards for and I wanted to create some cards that weren't too thick, so I decided to use a Heidi Swapp Believe paper pack that I've had for a little while. I just love this paper! I originally bought it to complete a mini album, but my poor little album is sitting in a drawer. For a while (a long time ;) I waited, thinking I'd come back to it, but then I decided this paper is just too pretty not to use!

I wanted to use the sketch over at Sweet Sunday Sketches so I used the cut apart sheet of 3x4 chalkboard-look journaling cards in the paper pack as the main element on my card. From there I cut a banner from the paper, which has glittery strips! and then cut a wreath and bow with my Cricut Explore.


Here's the inside - I love a top folding card!

Here's a look at all 6 of the cards! 

Of course, between Joy To The World and Santa Baby Hurry Down the Chimney, I was definitely humming Christmas Tunes!

Thanks for joining me today! Are you getting some Christmas cards done up yet? I hope you're having fun, no matter what you're doing!

Linked to:
PDE Linky Party - AG!
Crafting From The Heart - AG
Crafty Hazelnut's Christmas Challenge - #253 Time To Sing
CHNC Challenge Extra - AG Christmas
CHNC Patterned Paper Challenge
DL Art - Thankful Thursday November Challenge - AG


Sweet  Sunday Sketch Challenge - #293


Tuesday, June 2, 2015

Enjoy Today Art Journal!

I am super pumped that I finally got to try out the creamy, dreamy Dylusions Paints! If you haven't yet and are interested in them, let me tell you - you are going to love them! I gathered a bunch of supplies I was thinking of using and just decided to plunge in and see where it took me. I wanted to just play around with them, so what better place to do that than the Dylusions Art Journal!


 First I started off by painting the left page white and the right black. Then I used the two blues to sponge over a Heidi Swapp Enjoy stencil and some Distress Paints to sponge over a Tim Holtz stencil on the white page. On the left I used both blue Dylusions paints and some Cracked Pistachio to sponge over a scrolly Tim Holtz stencil. I think this was my fav colour combo - and the black behind it looks awesome! I used some Abandoned Coral and some yellow Distress Paint over the Today Heidi Swapp stencil.


This is the first page completed - I added some background stamps, Ranger Texture Paste through a Dylusions stencil, and some of the beautiful ribbon I received from Karen over at Little Scrap Pieces!  I love these Dylusions fashion stamps and I thought they'd go perfectly on these pages. I paper pieced them with some papers from my stash and glued them onto my pages. A Dylusions sentiment stamp and a Heidi Swapp shiny silver sticker finished it off!


On my second page I added some stamped images using Memento Lux Wedding Dress white ink - I absolutely love how this stamps so beautifully on the black background! To give my paper piecing shading and definition I added some Distress Markers around the edges.


Here's a look at both pages open in my journal -

Thanks so much for joining me today! I hope you're inspired to try out something new - maybe these fun paints or a stencil, or maybe just to get some fun goodies out of your stash and see where it takes you!

Linked to:
Little Scrap Pieces - show it off Saturday


Thursday, May 28, 2015

Project Life Birthday Layout!

My darling big girl turned 27 in March and I wanted to include all the pics from her birthday dinner here in my PL album, but since I had quite a few I decided to collage them into smaller pics within the Project Life iPhone app.

For my first page I had a few pics of my youngest swinging at the park that I wanted to include with my week, so I kept them on the left hand side of the page. Then on the right side I added my title, a PL card from the iPhone app, some birthday pics and a journaling card I made with a Pretty Cute Stamps set Any Better Than This.  I love the cupcake pic on the bottom right of this page! The cupcake is in focus and everything behind it is a bit blurry - I really need to figure out how to do this more!


For my second page I used some Heidi Swapp journaling cards and stickers along with some fun paper diecuts from Maggie Holmes. I cut my collaged pics apart and layered them onto the cards. I also added a couple stamps from Pretty Cute Stamps, and two 3x4 journaling cards from PL.


Thanks so much for joining me today! Be sure to check out the current scrapbook challenge at Bimini Moose for inspiration and your chance to win a sweet cut file!

Linked to:
613 Avenue Create - AG
Cookin' & Craftin - Thursday Link Up
Simon Says Stamp Wednesday Challenge - AG


Thursday, May 21, 2015

Week 14 Project Life!

I am just so impressed with how my Project Life album has been coming along! I seem to have found a process that works for me to get my photos from my phone to the printer and into my pages so woo hoo! I love that I'll be able to look back on 2015 and see how many little things I added to my album along with meaningful journaling and pretty pages all wrapped together ;)

For Week 14 I used some PL journaling cards printed from the PL app - love adding my journaling this way while I'm sorting through my pics - as well as some Heidi Swapp ephemera, some digital text and images from Rhonna Designs and some word stamps.


I created a journaling card on the bottom right of this page showcasing the products in my photo. On the top right I took a picture of my daughter's painting and then added some digital text over it to create a journaling card.

The journaling card on the top left didn't quite match so I covered part of the words with my photo and added some ephemera so it said 'Today Was Friday'.

I wanted to keep this page fairly simply and focus on the girls decorating their Easter eggs so I used patterned paper in the background pockets and kept the colours to pinks and greens.

Sunday was Easter, but since I have extra pics I'm going to make some traditional layouts along with my pocket pages for that day. Don't worry, I'll be back to share those pics!

Thanks so much for joining me today!! Don't forget to check out the current challenge at Bimini Moose and enter your own scrapbook project for a chance to win a super cute cut file!

Linked to:
DL Art - Thankful Thursday May Linky Challenge
Crafty Hazelnuts Patterned Paper - May Linky Challenge
Cookin & Craftin - Thursday Link Up
Inspiration Destination - AG #34
613 Avenue Create - AG #124