Saturday, November 5, 2016

Hello Fall Pocket Pages!

Hi friends! I'm back to share a Fall layout today! Since in Canada we have Thanksgiving in October - it seems like once Halloween is over my mind is on Christmas. I am trying to really focus on enjoying the right now since soon enough there will be snow on the ground and chilly weather! I created a two page pocket page layout using some Fall themed Project Life journaling cards, some Pretty Cute Stamps (on sale until Nov 10/16!!), along with other stamps, stickers and sequins from my stash. I love using pocket pages when I have lots of photos to scrap. I get to add all my pics along with pretty papers, stamps and stickers!

Here's my first page:

It was such an amazing day for us to visit one of our favourite parks!

I used the Harvest Happiness clear stamp set from Pretty Cute Stamps to add sentiments along with the leaves and sunflower. right on my journaling cards.

Here's a look at my second page:

This pumpkin sticker is printed on canvas and gives such a cool texture to the page! I added some of the pretty woodgrain washi tape and a sequin from the 28 Lilac Lane collection.

My girls love looking through the Project Life album - and it makes me so happy to see them talking about these memories!

Thanks so much for stopping by today! I hope you're able to enjoy some lovely Fall weather wherever you are, and have a wonderful, crafty week!

Linked to:
PDE Linky Party - Anything Goes
DL Art - Nov Linky Challenge
Little Scrap Pieces - Show It Off Saturday


Tuesday, November 1, 2016

SpiegelMom Scraps November Blog Hop!

I'm so excited to be joining the SpiegelMom Scraps team as a Guest Designer today to bring you some inspiration to Cozy Up and Create! There is a super fun Blog Hop going on to bring you tons of inspiration to start creating. You should have arrived from the SMS Blog - and if not you can pop over there to start your creative adventure! When you are a crafter, Christmas is one of those events where you want to get lots of things created to give to those special friends and family members, but you also want time to enjoy the holidays. Even though it's still early, by starting now you'll have time to make those special presents and even get in a few last minute ones - because we all know about that!


I love to give handcrafted gifts for the holidays, and I love to bake - so what better than to start thinking about packing some yummy and beautiful gifts for those loved ones on my list! I started off with a kraft cardboard box and added some pretty patterned papers from the Heidi Swapp Believe collection. This is paper that I've had for a while - one of those things I have hoarded because I love it, but I am really trying to work on using those things! I added some layered papers and journaling cards to decorate the front of the box and for the pretty tag. Then, comes the fun part - embellishing!! I'm sure you know there are tons of fun embellishments in the SpiegelMom Scraps Shop! I added the pretty sequins from the Holly Berries sequin mix as well as a few white sequins from the Wedding Bells sequin mix to my tag and tied it with the Natural Burlap String before adding a pretty red bow. On the front of the box I added Cork Confetti Stars, Cork Confetti Tiny Stars and the pretty Holly Berries Sequins again!


Here's a peek at all the goodies I packed inside my Christmas baking gift box! These fun SpiegelMom Scraps embellishments were perfect to add to my gift packaging - and the awesome Glassine Bags were wonderful for adding packages of tea, muffins and cookies! I used doilies, stamps from the Lawn Fawn Love You A Latte stamp set, Christmas patterned papers and lots of sequins, burlap string and cork! I think that packaging really is everything and makes even a simple gift so special!

You can see below a description of each of the elements in my gift packaging:

1. Layered patterned papers and journaling card on the outside of my gift box decorated with sequins and cork.
2. The tag for the gift box using a journaling card from the Believe collection, tied with burlap string and decorated with sequins and a stamped holiday sentiment.
3. Goodies inside the gift box tucked into glassine bags and decorated.
4. Mini Pumpkin Loaf (recipe below!) and Banana Bran Loaf, wrapped with patterned paper and decorated with a handmade embellishment topper.
5. Supplies: Holly Berries Sequin Mix, Wedding Bells Sequin Mix, Mini Glassine Bags, Medium Glassine BagsNatural Burlap String Cork Confetti StarsCork Confetti Tiny Stars.
6. Flavoured teas tucked into a glassine bag and decorated with stamped tags, a doily, sequins and a cork star.
7. A hand crocheted mug warmer with a stamped tag. I pinned the burlap string on with a safety pin filled with sequins for extra embellishment!
8. Mini pumpkin muffins and chocolate mint cookies tucked into glassine bags and tied with string and handmade tags.
9. Yummy chocolates inside these adorable mini glassine bags, which I first stamped using Stazon and then tied with string and a button. A little Glossy Accents holds on the shiny sequins.

Here's the Pumpkin Bread recipe, which I used for the mini muffins and mini loaf! It will have your kitchen smelling like Christmas in no time!

Here's the Blog Hop line-up, and next on the list is the very talented Lisa Kingston . Head on over to her fabulous blog to see the amazing project she has come up with after leaving a comment for a chance to win a $10 Gift Certificate!

Karla Yungwirth That's Me! 
Felicia Young 

I'd love for you be in the running for the $10.00 shop credit, so be sure to leave comments on all the blogs to be entered! Thanks so much for stopping by today and have a wonderfully, fantastic, creative day! 

Linked to:
Simon Says Stamp Wednesday Challenge - AG
Sunny Day Crafting - AG
PDE Linky Party - Anything But A Card
DL Art - Nov Linky Challenge
Crafty Hazelnut's Patterned Paper - Nov Link Up
CHNC Christmas Challenge - AG Christmas
CHNC Extra - Nov Link Up


Sunday, October 30, 2016

Halloween Treats!

My girls are so excited about Halloween, and one of the things they love to do is give out treats to their friends at this time of the year! I recently saw these adorable diecut witch hats on a fellow blogger's post and thought they'd be perfect to add to Erica's treat bags. You can find this super cute Witch Hat Lollipop Holder FREEBIE svg file here from SVG Cuts.


I also wanted to make up some cute tags for the bags, so I started by making a grid in a word processing program on my computer and inserting the Halloween digital stamps and sentiments from Pretty Cute Stamps. I originally made these as Lunch Box Notes, but figured they'd also work great to add to a tag. I left them uncoloured and added crayons to the treat bags so the kids could colour them after eating their candy. 'Cause you know a 4 year old is eating the candy first, lol!


I used the label feature on my computer to quickly create this sheet of labels - adding a sentiment from the Werewolf digital stamp set from Pretty Cute Stamps and typing in Erica's name below. After I stuck the stickers to the back of the tags, these cute bags were ready to tie up and head to the class party!


I thought these cute tags finished off the treat bags so nicely! 

Here's Erica all ready to celebrate. She's actually planning on being a witch for the big day but wanted to change it up for today. And, hey, when you're 4 that's just how you roll!


Thanks for stopping by today! If you're celebrating Halloween, I hope you have lots of spooky fun!

Linked to:
DL Art - Thankful Thursday Oct Link Up
Little Scrap Pieces - Show It Off Saturday
PDE Linky Party - Anything But A Card
SSS Wednesday Challenge - AG


Wednesday, October 26, 2016

Sushi Buddies Thank You Card!

Howdy friends! Hope you're week is going amazing! I'm sharing a super cute thank you card using the Kitty Bee Designs digital stamp Sushi Buddies on my spotlight post at the Kitty Bee Designs Blog today.

I started off colouring this cute sushi stamp using Prismacolor and Hobby Colour Markers, which are both alcohol based, after printing it on white cardstock. I used the sketch over at Mojo Monday to lay out my design and added some fun Silly Sushi diecuts from Pretty Paper Pretty Ribbons.


I added the stamped sentiment, which actually means Thank You from the PCS Sushi Sentiments stamp set on the square background.

 Inside, I used the Thank You from the PCS Sushi Sentiments stamp set. I love the font!

I used the pretty papers from the Pink Paislee Take Me Away collection and added some pretty sequins from SpiegelMom Scraps Mocha Mint Dream sequin mix.

Thanks so much for stopping by! Be sure to check out the Kitty Bee Designs blog, where you'll find lots of inspiration!

Linked to:
PPPR Linky Party - October Link Up
DL Art - Thankful Thursday Oct Link Up
Mojo Monday - 471


Tuesday, October 25, 2016

Two Fall Cards!

A couple weeks ago I made some Fall cards for a little challenge at The Clique Facebook page for World Cardmaking Day, so I thought I should share them here while Fall is still in the air!

The first card was a challenge to use vellum and a diecut. I layered a handcut vellum banner over a woodgrain paper background and tucked some diecut leaves behind it.

 Then, I used the 'thankful' and pumpkin cut files from Creative Scrapbooker Magazine - it's free and  you can download it here along with other free files!

I used some Fancy Free patterned paper behind my pumpkin and added some sequins and a couple drops of yellow Izink. Some faux stitching using a red pen on the vellum finished it off.

For my second card the challenge was to fussy cut an image, and I watercoloured a cute little pumpkin girl stamp sitting on a tree stump, both older stamps from C.C. Designs. I masked off the girl to make her look like she was sitting directly on top of the stump and then used Distress and Tombow markers to watercolour the image before fussy cutting her out.

I layered her over the free string art cut file from The Clique and backed the cut with BoBunny papers from the Believe collection. I love the look of different papers behind a diecut!!

Inside, I used a sentiment and pumpkin image from the Pretty Cute Stamps Thanksgiving Eats stamp set.

I added some pretty sequins and a button from the 28 Lilac Lane collection, and used a cute little ribbon across the top of my card. I gave this to my niece at Thanksgiving, which in Canada was a couple weeks ago, and she loved it!

Thanks so much for stopping by today! I hope you have a wonderful, crafty week!

Linked to:
DL Art - Thankful Thursday Oct Link Up


Monday, October 24, 2016

FCCB #288 - Fright Night

 Happy Monday and welcome to another Monday challenge
at the Fantabulous Cricut Challenge Blog!


Challenge #288 Fright Night

This Weeks Sponsor

Pretty Cute Stamps
Create a project inspired by Halloween!

And we are giving away a $25 Amazon gift certificate, courtesy of FCCB Design Team! This prize will be given if there are 10 entries or more.

To qualify for the prize, be sure to use at least 1 Cricut cut on your project and if it's not obvious, let us know what cartridge you used. If you use a Cricut Explore machine, at least one cut must be from the Cricut catalog of images.

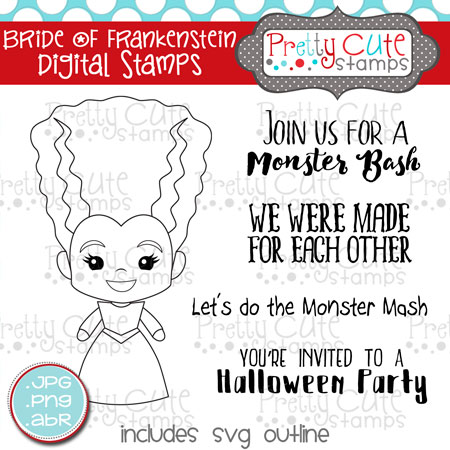
For my card I used the Pretty Cute Stamps digital stamps Bride of Frankenstein, Zombie, and Vampire! They are just so super cute - perfect to add to all the Cricut cuts I used for this fun Halloween Night scene. I cut the bat from the CTMH Artistry cartridge, the spider from the Mini Monsters cartridge and the pumpkins from the Gypsy Wanderings cartridge. 

I coloured my images with Prismacolor and Hobby Colour Markers and layered them on a Distress Inked background using Evergreen Bough, Milled Lavender and Chipped Sapphire Distress Inks. After I sponged on my inks I spritzed my background with Perfect Pearls to give it a shimmery, starry look!

I added some shiny Jack O Lantern sequins from SpiegelMom Scraps - perfect for a Halloween theme! I used some yellow watercoloured scraps to add behind my pumpkins and bat.

 Inside and on my envelope, I used digi stamps and a sentiment from the Candy Faces and My Boo sets! I also added a sentiment from the Bewitched clear stamp set on my envelope.

 A few foam dots add dimension to my spider and bat, and you can see here how that Perfect Pearl mist just shimmers!

Here's a look at the Digital Stamps I used on my project:
Candy Faces

Vampire

Zombie

My Boo


Bride of Frankenstein

And this awesome sequin mix!
Jack O Lantern sequins

Thanks so much  for stopping by! Be sure to head over to the FCCB blog to see what all the other Design Team members have come up with - and give our awesome sponsor some love at the Pretty Cute Stamps Blog and the Pretty Cute Stamps Store! Have a wonderful, crafty week!

Linked to:
DL Art - Thankful Thursday #190 Halloween
Little Scrap Pieces - Show It Off Saturday


post signature

Wednesday, October 19, 2016

Pretty Cute Stamps October New Release Blog Hop with Video!!

Thanks so much for joining us for the October 2016 Digital Stamp Release Blog Hop, where we are all sharing projects featuring the NEW digital stamps this month that are now available in the Pretty Cute Stamps Store.


If you came from the Noe's Blog, you are in the right place. If you just stumbled across this post and would like to start from the beginning, please visit the Pretty Cute Stamps Blog

For my project for the hop, I've used the Fall In Love stamp set to create a pocket page scrapbook layout using photos from a wonderful morning my husband and I went on a little date - walking in the fall weather. Fall does not last long here in Calgary, Alberta Canada. All of sudden the leaves have turned and then a couple weeks later - depending on how much wind we get - it seems like they're gone. So when we do see those colours changing we run out to enjoy the weather and get some photos!


After I put my photos into the pocket page I created this journaling card using the Fall In Love digital stamp. I printed it out in a light vanilla ink colour using Pic Monkey so that I could colour it in with Prismacolor and Hobby Colour Markers (both alcohol based) using a no-line technique. The stamped image seems to disappear! I went over the FALL sentiment with a gold gel pen and then added some sequins from the Day In The Woods collection from SpiegelMom Scraps. Lastly, I layered it onto a Project Life card from the Seasons Collection.

I printed hearts and leaves out from the digital stamp set, varying the sizes - one of the awesome things about digital stamps! I added some Project Life embellishments and some more pretty sequins!

Here's a look at the leaves I added to my journaling card - you can use your printed and coloured images just as you would stickers!

I've made a little video where you can see how to print a digital stamp out in a neutral colour to make your own no-line colouring project, as well as seeing how I organize my digital stamps! Click here to see the video. Don't forget to Like and Subscribe!

You can see this beautiful stamp set below - FREE today!!

Blog Candy!! There is a $15 Gift Certificate to the PCS Store available to win! All you need to do is:
1) Comment on each of the blogs. 
2) For extra chances to win you can LIKE Pretty Cute Stamps on Facebook and/or sign up for the Pretty Cute Stamps mailing list. (Leave an extra comment for each on the Pretty Cute Stamps blog as your entry)
A random winner will be chosen on Monday, October 24, 2016.

Be sure to check the Pretty Cute Stamps Store to pick up your favorite sets!

October 2016 New Releases

This is the stamp set I used for my project, and available as a FREEBIE digital stamp for you today only at the Pretty Cute Stamps blog!


Now, you can head over to the next stop on the hop- Henriette's blog

If you get lost along the way, here's the lineup!

Thanks so much for joining me today! Don't forget to leave your comment for a chance to win :) and have a fantastic week!

Linked to:
Sunny Day Crafting - AG
DL Art - Thankful Thursday Oct Link Up
Word Art Wedensday - AG
Lasting Memories Layout Challenges - Elements Of Nature