Showing posts with label tutorial. Show all posts

Wednesday, March 31, 2021

Kraftin' Kimmie Stamps - My Favourite Earthling!

 Hello friends! I'm over on the Kraftin' Kimmie Stamps Blog today with a fun and fabulous card featuring the super cute Out Of This World Stamp Set, which is on sale at 40% off for the next week! 


You can check out the replay on the cool galaxy background here!

Thanks so much for stopping by! Be sure to head over to the Kraftin' Kimmie Stamps Blog to see lots of closeups, details and a product list!! Have an amazing day my friends!

Monday, September 30, 2019

Emerald Creek Demo Tags!

Hello! I hope you're all enjoying Fall weather - here in Alberta we had a crazy snow storm over the weekend with 30 cm of snow (that's a foot!) in Calgary. So, I for one stayed in warm and cozy prepping for a fun demo at the Scrapendity Scrapbook Store using Emerald Creek Craft Supply products today. Everyone had fun playing with some fun powders and making some neat tags, so I thought I'd share what we did today, and I've included the basic instructions for each tag!

Flower Tag

1. Stamp Wild Rose stamp on tag.
2. Use Southern Ridge Trading Company Under The Sea Bubbles Stencil with Embossing Ink Dabber and emboss with Just Java Rock Candy Embossing Powder.
3. Use Distress Resist Spray to splat spots onto background of tag and emboss with Peppermint Rock Candy Embossing Powder.
4. Use Blue Distress Oxide Inks to sponge colour onto back of tag.
5. Use Ranger Matte Medium to glue Marshmallow Rock Candy Embossing Powder to center of flower (stamped a second time on patterned paper). Do not emboss.
6. Fussy cut second flower and glue to tag.
7. Apply Embossing Ink Dabber to metal brad and emboss with Peppermint Rock Candy Embossing Powder.


Emerald Creek Supplies: 
Pam Bray Rock Candy Embossing Powders: Marshmallow, Java Plum, Peppermint
**Rock Candy is BRAND NEW and will first be available at local Alberta Retailers before it is on the Emerald Creek Website


Coffee Tag 
This smells so good!!

1. Stamp Coffee Sign Board stamp with waterproof ink. (I used Gina K Amalgam Black)
2. Use Distress Oxide Inks (Mahogany and Spiced Marmalade) to ink tag. Colour in coffee cup if desired.
3. Use Vanilla Sugar Aroma embossing powder and Vicki Boutin circle stencil.
4. Use Canadian Maple Aroma embossing powder and Vicki Boutin coffee ring stencil.
5. Use Ground Espresso Distress Oxide Ink to sponge over edges and embossed areas. Wipe excess off with cloth.
6. Smell.... ummmm!


EC Supplies:


 Under The Sea Tag

1. Use background circle stamp and Versamark Ink to emboss Baked Velvet Aegean Sea Embossing Powder in various spots around the tag.
2. Use background diamond stamp and Versamark Ink to emboss Baked Velvet Dusk Embossing Powder in various spots on tag.
3. Spray background with green and blue Dylusions ink sprays and blot with paper towel.
4. I used the SRTC Fish Net Stencil on the background with Mermaid Lagoon Distress Oxide Ink, but we skipped this step in the demo.
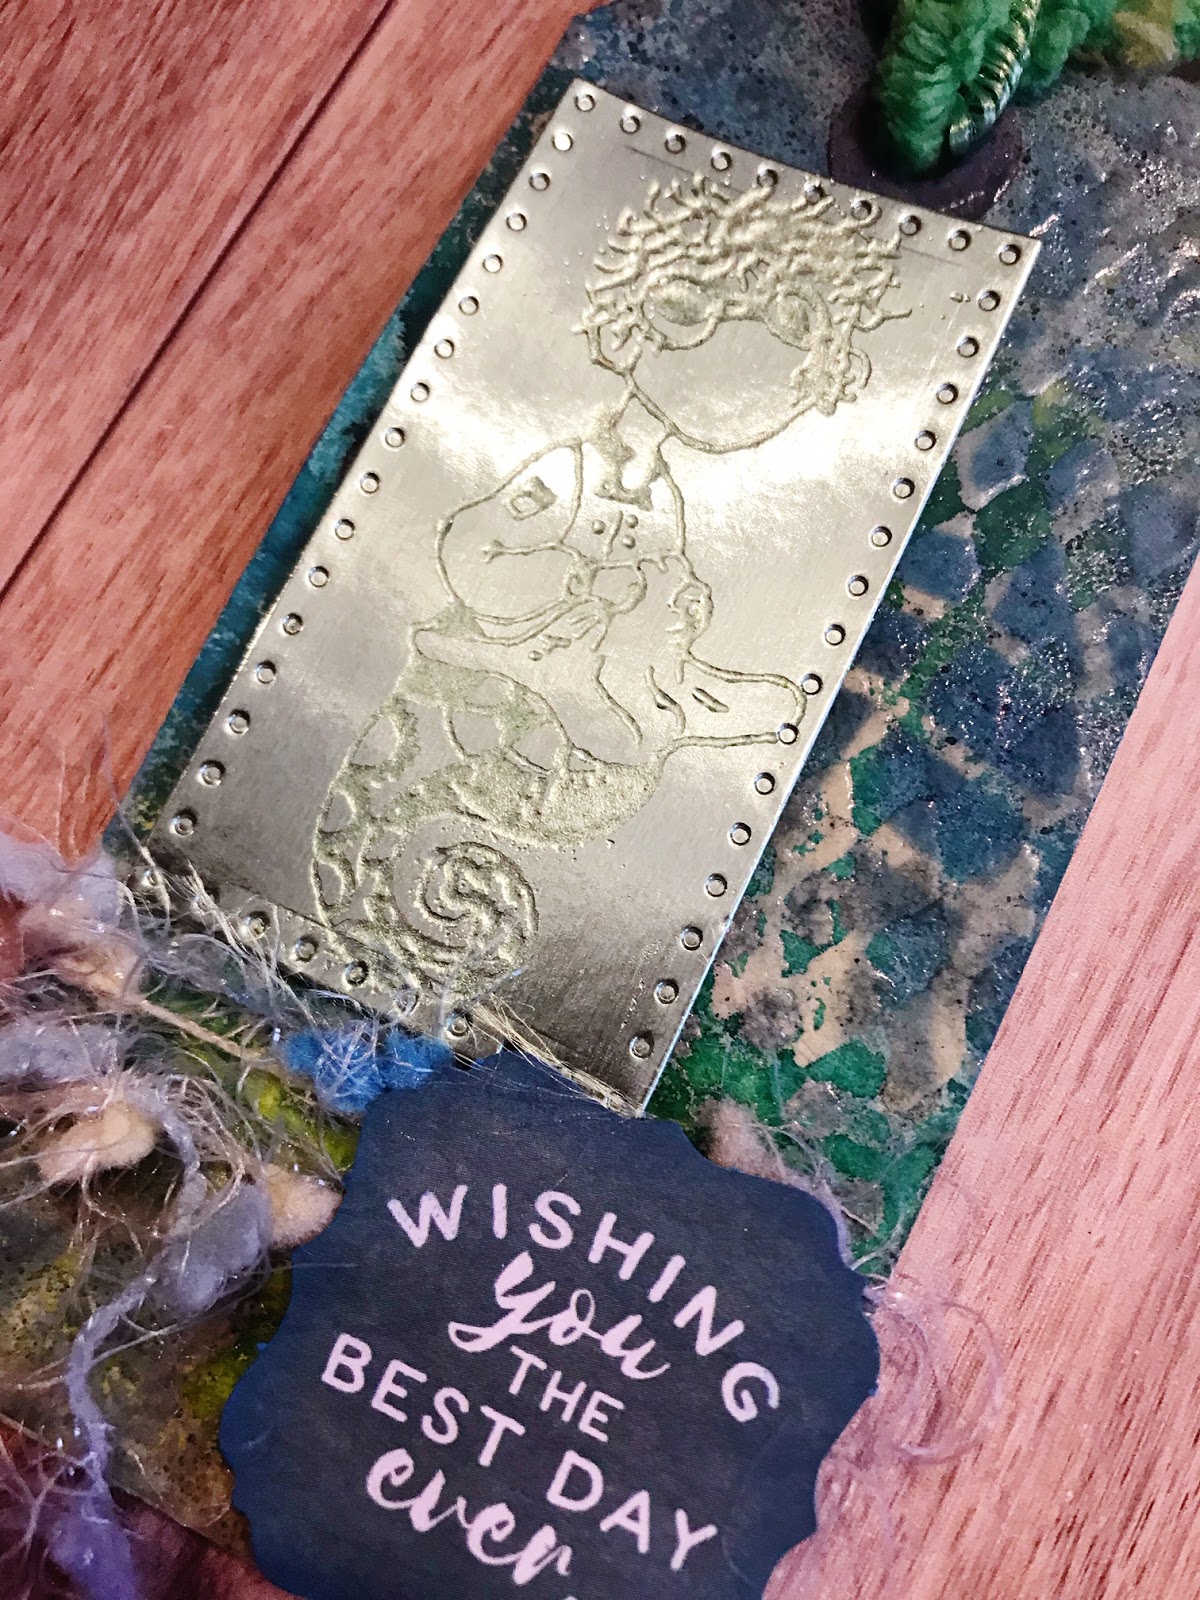
5. Rub Metallic Cardstock diecut with powder bag to reduce static. Use Mermaid Tears stamp and Baked Velvet Lime Embossing Powder on Metallic Cardstock to create an etched look.
6. Add yarn, embossed Mermaid Tears Steam Punk Sea image and a sentiment to tag.


Supplies:
Seth Apter Baked Velvet Mediterranean Kit Embossing Powder (Aegean Sea, Dusk & Lime)
Mermaid Tears Steam Punk Sea Stamps (Mikas & Adaline)


Candy Cane Christmas Tag


1. Stamp woodgrain stamp on background.
2. Use sponges to add brown Distress Oxide Inks over stamped image.
3. Use Texture Paste and Tim Holtz Snowcap Stencil and add Marshmallow Rock Candy Embossing Powder. Heat with heat gun.
4. Glue on Metallic Cardstock oval.
5. Stamp Emerald Creek Candy Cane Stamp with Festive Berries Distress Oxide Ink on white cardstock. Use Gold Wink Of Stella brush to colour in bow.
6. Use foam tape to pop up candy cane image and tie red and white striped ribbon on top of tag.


EC Supplies:
Pam Bray Marshmallow Rock Candy Embossing Powder


Thanks so much for stopping by! If you haven't tried Emerald Creek Powders you just might want to see what you've been missing 😉 PS Be sure to stop back tomorrow where you can see another tag I'm making for the Emerald Creek October Dare! 


Linked to
SSS Wednesday Challenge - AG
SSS Monday Challenge - Get Ready For Christmas

Tuesday, December 11, 2018

Canvas Corp Brands - Christmas Bulb Challenge!

Hello! Hope you all had a great weekend. We took it easy, did some crafting - of course - and watched some Christmas Classics. My favourite thing to do is snuggle up on the couch in the living room with the Christmas Tree on. I have to remind myself to just sit and relax sometimes! Since we're in the festive spirit, I definitely wanted to share a tutorial I have over at the Canvas Corp Brands Blog where I'm creating three Christmas ornaments for this month's Christmas Bulb challenge. I'm using beautiful pre-printed canvas in the Canvas Corp Jolly Christmas Mix & Match Pad from the Canvas Corp Brands Shop. These are quick and easy to stitch up for your own tree or as a gift set.


Here's inspiration for our challenge! We'd love for you to join us. You can link up HERE. Just use at least one product from Canvas Corp, 7gypsies or Tattered Angels!

Thanks so much for stopping by! Be sure to check out the Step by Step tutorial, closeup photos and a supply list on the Canvas Corp Brands Blog. Have an awesome week friends!

Linked to:
SSS Monday Challenge - Warm Winter Wishes


Thursday, September 27, 2018

Canvas Corp Brands - Fall Blog Hop!

Hello Friends! Thank you so much for stopping by today. You are in for a treat! Today I am participating in a MEGA BLOG HOP!!!!!! There are 18 fantastic designers world wide that have come together to showcase terrific fall projects that you can recreate and put your own artistic touches on in your craft room. You have seen a lot of these designers featured on The Canvas Corp Brands blog using Tattered Angels, 7 Gypsies and and Canvas Corp products! Do you see a trend? This is the CCB Fall Blog HOP! Each of these designers have created a project to share with you on their blog. Some are offering prizes - including me! so please hop on through to each blog. If you are inspired we would love if you would share the hop with others 💓 We would truly appreciate it!

For my project for this fabulous fall hop I’ve created a pretty autumn wreath using some dollar store goodies I upcycled with lots of fun products from the Canvas Corp Brands Shop. Fall is my favourite season! I can’t help getting excited about the fall colours, sweater weather, and Pumpkin Spice everything! 


Here are the steps I used to create my fall wreath:

I sprayed a white dollar store grapevine wreath with Tattered Angels Rose Gold and Woven Burlap Glimmer Mists and let dry. Then I glued strips of Canvas Corp burlap around, using hot glue to attach the ends.


Next, I sprayed faux leaves and berries (dollar store finds) with Golden Lime and the Rose Gold Glimmer Mists and the acorns and pinecones with the Woven Burlap and Dark Vintage Green Glimmer Mists. The mica in the mists gave the fall foliage a lovely shimmer and shine and adds such a nice effect!


I sprayed the Tattered Angels Mixed Media Mini Origins 'The Vines' paper with various colours of Glimmer Mists and then fussy cut them out. This mixed media paper is just amazing to work with - so thick and perfect with water mediums. I added some Emerald Creek Thanksgiving Embossing Powder to parts of the leaves and heat embossed to add even more glittery goodness and added a bit of ink around the edges.


I finished off the wreath by gathering some Canvas Corp Red Hemp Rope into a circle and hot gluing it to the wreath, adding all my glimmered elements and some pretty Little Birdie Crafts handmade flowers. This wreath came together nice and quick and I just love how it turned out!


Here are a few closeups:


BLOG CANDY!

Be sure to comment below for a chance to win an envelope of Happy Mail! I will be sending out a small package of goodies with some fun crafty surprises included to one of the people who leave a comment by Monday, October 8th!! Winner will be announced Tuesday, October 9th


Here’s the full blog hop list-

  1. Scrappy Cafe (Betz Golden)
  2. Papierstau (Sanna Lippert)
  3. Marie Nicole Designs (Marie Heiderscheit)
  4. Steph Ackerman
  5. The Crafty Robin
  6. Monica Taylor
  7. Karla Yungwirth That's Me!
  8. Lynne Joncas
  9. Priya Satish
  10. Erin Reed
  11. Natassa Blazaki
  12. Peggy Lee Baker
  13. Nadine Carlier
  14. Jaine Drake
  15. Christine Santos
  16. Viktoriya Porechnaya
  17. Hema VelCraft
  18. Linda Israel

I am so excited to get out all my fall decor now and celebrate the season! 🍂 Be sure to hop over to the next stop on the list - 
Lynne Joncas and see the amazing project she’s come up with. 🍁 I hope you get lots of inspiration to start your next fall project!

Linked to:
SSS Wednesday Challenge - AG


Thursday, June 22, 2017

SpiegelMom Scraps - Retro Inspired Canvas!

Hello! I'm back to show you a canvas I'm sharing on the SpiegelMom Scraps blog today. I love creating canvases, which are awesome as home decor or gifts for someone special! Since our theme this month is 'Take Us Back June' I thought this cool paper doll stamp from Julie Nutting would be perfect combined with the vintage Architextures papers and Prima armoire tag! Here's a look at how this one turned out using lots of pretty SpiegelMom Scraps sequin bling, 7gypsies Architextures, and Tattered Angels Glimmer Glam! You can follow along with the tutorial on the SMS blog.

Don't forget to use the code KARLA15 to save 15% off your purchases at the SpiegelMom Scraps shop!!

Thanks so much for stopping by today! I hope you have a wonderful week - and be sure to check out the full tutorial on the SpiegelMom Scraps blog!!

Linked to:
DL Art - Thankful Thursday June Linky Challenge
SSS Wednesday Challenge - Patterned Paper
FFC 193 - AG


Tuesday, January 26, 2016

Happy New Year Art Journal Tutorial!

Hi there friends! I was recently making an art journal page, inspired by the amazing and talented Vicky Papaioannou's New Year Art Journal video, and thought I'd make a little tutorial. Sometimes when you look at a mixed media piece it's hard to pull apart the layers and see where to start. It's really not that hard and following these steps you can create your own piece - either in an art journal, on a canvas, or even on a tag.

Here's a look at my art journal page in my Dylusions Art Journal:

And here are some step by step directions to get you started:

I used a  white gel pen to write down my goals around the page. This beautiful script stamp, sequins and stars are from the Believe Script stamp set by Pink and Main.


Thanks so much for stopping by today! Have you set any goals for 2016? I hope this inspires you to get out some paints and inks and have fun playing!

Linked to:
Pink & Main Challenges - #5 Sparkle
Craft Stamper Magazine - January Challenge AG with a stamp
Word Art Wednesday - AG
Use Your Stuff  - Sequins or Glitter (stamped sequins!) 
DL Art - Thankful Thursday January Linky Challenge


Tuesday, June 9, 2015

Mixed Media Wall Hanging Tutorial!

I'm back today for a post from the Scrapendipity Way Of Life Blog to bring you a tutorial for a pretty mixed media wall hanging project!

I started off by taking a 5x7" canvas board and misting it with Dylusions Inks.

I then sponged Distress Inks around the edges of my canvas matching the colours of the spray and adding some Vintage Photo.

I used Vintage Photo Distress Ink to sponge around the edges of some torn script paper and a floral paper from a Tim Holtz paper pad.

I used a Dylusions sentiment to stamp onto paper, which I then cut out, sponged with ink and glued onto a cardstock background.

I added some Distress Ink to a craft sheet and mixed in Texture Paste to create a coloured paste.


I then used a stencil to add the coloured paste to my background after adding all my elements and a bit of gelatos over top.

 I added a doily, ribbon, flowers and my floral paper to the left bottom of the canvas.

And to finish it off I layered a diecut leaf, some more paper flowers, a metal butterfly embellishment, and some ribbon!

Thanks so much for joining me today! I hope you'll give mixed media a try and just get out some paints and sprays and start layering!


Friday, October 28, 2011

Mosaic Christmas Ornament and Tutorial

This is a cute Make & Take that Scrapbooker's Paradise did for Toonie Thursday this week.  They always have such cute cards, but I especially liked this one as this technique could be used for so many things! I'm using mine for ornaments, but you could make tags, coasters, cards, etc, and not just for Christmas.

 The Make & Take (front and back)

After buying only a few supplies I went home and make a couple more so far with my 4 year old. I'm thinking everyone on my Christmas list would love one of these!


 For this one I used a strip of paper across the middle instead of ribbon tied on after.
 How to:
Cover a chipboard coaster with Sookwang Tape on each side and trim around with scissors to remove extra.  Cut up strips of desired paper into random shapes and place onto coaster with small spaces in between.  Sprinkle embossing powder onto coaster, which will stick to the Sookwang Tape in the spaces.  Tap off and heat emboss. Repeat with other side. Tie ribbon around coaster and ink edges with desired ink color.  I used a fast drying pigment ink pad, directly on the coaster. Choose die cuts or stickers and pop up with foam dots or apply directly to the coaster.  Embellish with glitter if you wish, and then punch a hole in the top center and tie with ribbon.

Tip: Good idea to use Teflon coated scissors if you have them to avoid having to clean the sticky tape off your regular scissors.  Also, scraps of the tape can be overlapped to cover your coaster and will not show seams once you cover and emboss.


Linked to Friday Link Party at Creation Corner, Simply Link Party, Show and Tell Friday and Scrapbookers' Paradise Facebook page.