Tuesday, June 14, 2016

Distress Stained Kraft Resist Card!

Hi Crafty Friends! I'm back today with an inky card I made while watching the Day 5 video from Tim Holtz' Creative Chemistry 101. This was such a great refresher and I can't wait to try out all the other techniques. This card focuses on using Distress Stains and stamping.


I started off by cutting a piece of the 12x12 Kraft Resist paper pad into a 4 x 5.25" piece and first adding a light layer of Picket Fence Distress Stain. Then I added Worn Lipstick and Shaded Lilac and dried my background. You can see the resist script standing out below.

Next I took Distress Inks and blended them onto my background. I love how this adds another layer of inky fun!

I used a grey shade of Archival Ink to stamp this Tim Holtz man with the umbrella and used - my new favourite! background stamps to stamp around the edges. I added some Utee to some stamped images to add a bubbly, watery effect. I find if you heat the image from behind it will melt easier without blowing the powder around.

Here's a look at the envelope where I used some coordinating Tim Holtz stencils and stamps. You can also see how the resist really shows up after layering on some Distress Inks! I added a little banner, popped up with foam dots, with a couple more Distress stains blended onto the Kraft paper and a Tim Holtz sentiment stamp using Black Archival Ink.

Thanks so much for stopping by today! Don't forget to also check out the Sneak Peeks that are going on at the Pretty Cute Stamps blog featuring the June 2016 New Releases and come back Thursday for the big Blog Hop!

Sunday, June 12, 2016

Pretty Cute Stamps June 2016 Sneak Peeks!

This is an exciting week! The new digital stamp releases arrive at the Pretty Cute Stamps store on Thursday, but don't worry, you'll get lots of sneak peeks between now and then to get you super excited for these awesome sets that Lisa has put together for you!!


I decided to make a pocket page scrapbook layout using the new Mermaid Kisses digital stamp set! I love this sweet little mermaid and the fonts used for this sweet sentiment. I can't wait for you to see the whole set released on Thursday ;) I've been working on some summer photos from a camping trip we went on a couple years ago. It's amazing to see how much the kids have grown since then! This set along with some fun Simple Stories papers were the perfect thing to finish my page.

I used a cute summery journaling card from Simple Stories in my pocket page and added this adorable little mermaid, which I coloured with Prismacolor and Hobby Colour markers.

I love, love, love this sentiment! I thought it would be perfect as a focal point for my journaling card - so I printed the digi stamp directly onto a piece of patterned paper cut to 4x6. I used some Glossy Accents to accent the starfish after colouring with Prismacolor pencils and then added some embellishments and stickers.

And here's a sweet FREEBIE available for you this week! 

Thanks so much for stopping by today! Be sure to head over to the Pretty Cute Stamps blog to pick up your FREE digital stamp and see all the other amazing sneak peeks - you'll be blown away by all the new sets and the new additions to our Design Team! There will be sneak peeks everyday until Thursday when you'll get to see all the sets and join in the New Release Blog Hop! Have a wonderful week everyone.


Saturday, June 11, 2016

Hello There - No Line Alcohol Ink Colouring!

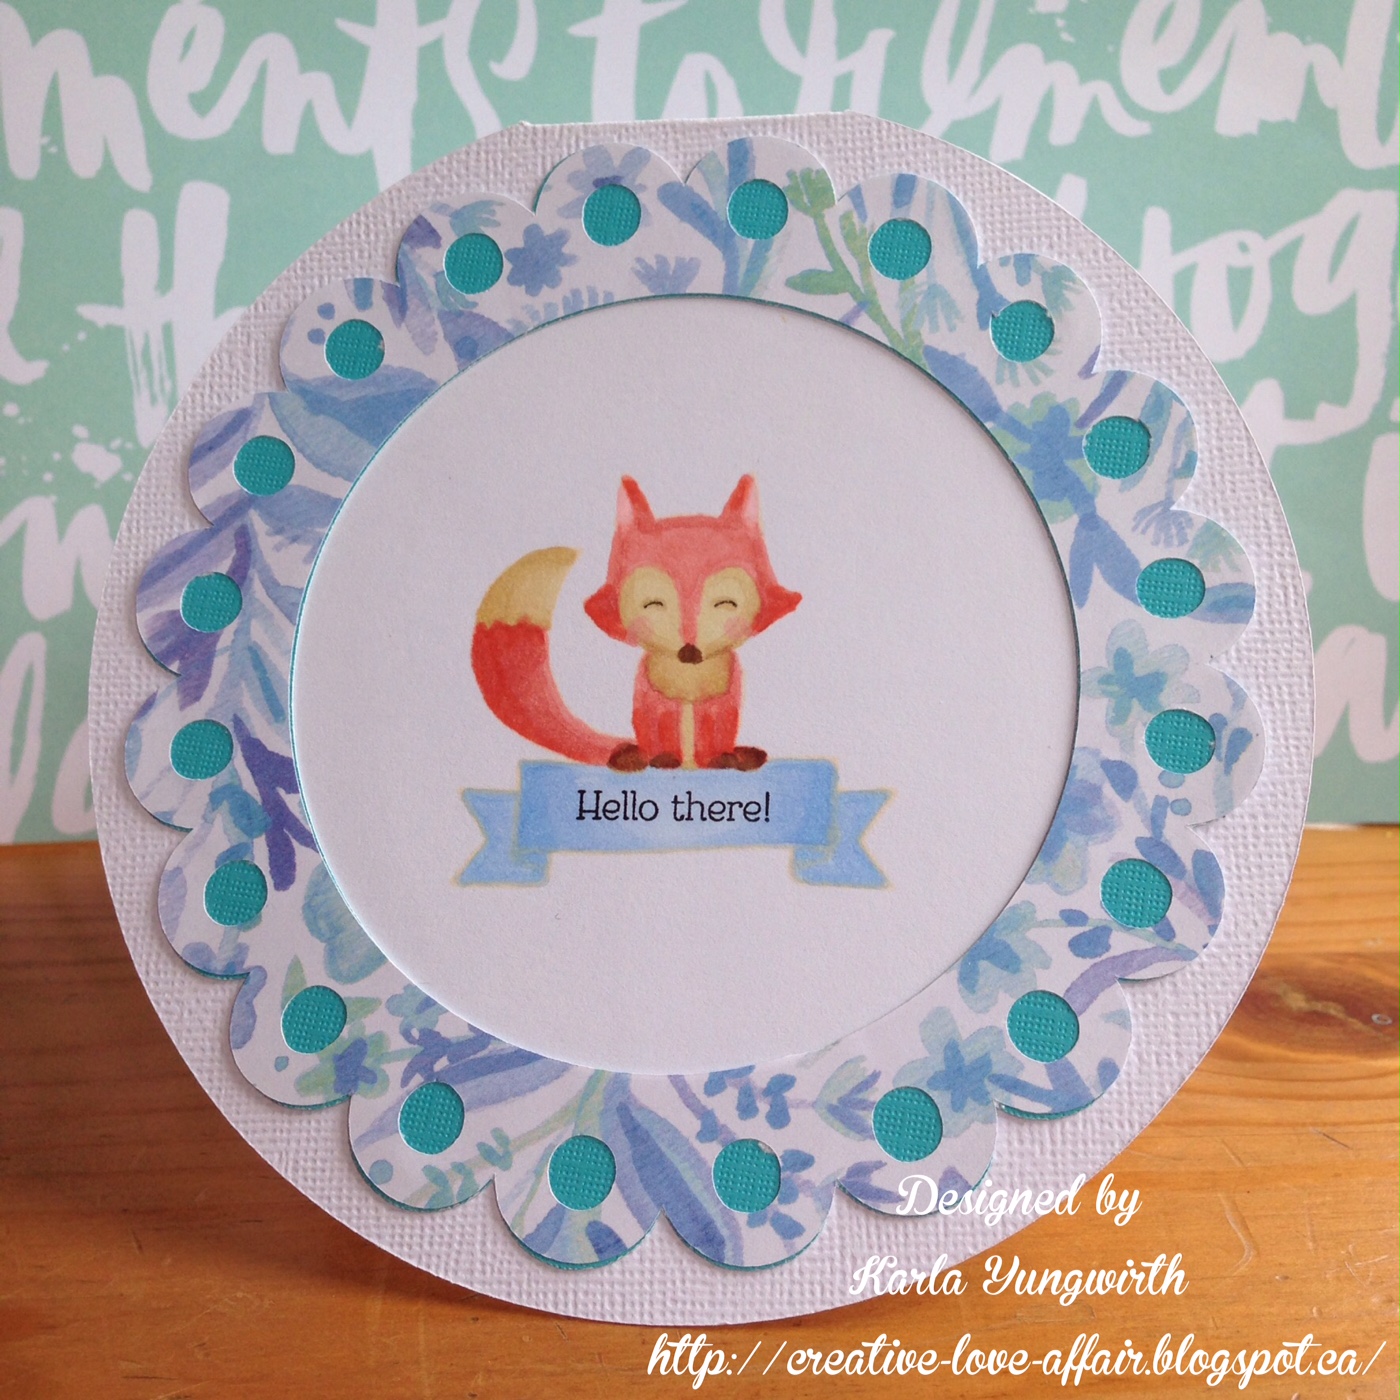
Hi there crafty friends! I'm back today to share this cute circle card I made for a friend who just had a baby boy. I used my Cricut Explore to weld a circle together to make the card base and then cut the scalloped frame using a blue floral MAMBI paper with a blue cardstock layer underneath.

I stamped this sweet little fox from CTMH with a cream coloured dye ink before trying a no-line alcohol ink colouring technique. I have to admit, when I first started colouring him it looked really awful! But that's the great thing about trying new things- if it doesn't work you can throw it away and you've probably figured a few things out along the way. After I added some shading he started to look more normal!

I used the writing feature in the Cricut Explore and added this pretty congrats inside the card.

I love how this turned out, and will definitely play around more with this technique!

Thanks so much for joining me today! I hope you're having a wonderful weekend.


Wednesday, June 8, 2016

Awesome Sale At Pretty Cute Stamps!!

I just had to pass on this sweet sale! 
Head over to http://www.prettycutestamps.com/category/sale.htm to get these awesome sets before they're gone!!

Hugs!
Have a great day <3
Karla

Tuesday, June 7, 2016

Double Distress Tag!

It's been a busy week here this week! We had Grandma come to visit on Sunday and the girls have been so excited that she is spending the week with us. We took a little trip to the Farmers Market, and she got to see Erica's soccer game tonight as well as doing lots of puzzles, reading books, playing games and having snuggles. Of course, I did manage to sneak in a little crafty time and grabbed a tag to play with quickly. After I heat embossed it with a woodgrain stamp I realized I had already stamped on the other side with some fun Art Foamies stamps, but instead of starting over I just decided, hey, why not decorate both sides?!!

I'm retaking the Tim Holtz Creative Chemistry 101 class from Online Card Classes - and loving the review! This was the perfect opportunity to use some of the fun techniques Tim is so awesome at teaching. Here's the first side of my tag:


I started off by heat embossing with Versamark and clear embossing powder using a woodgrain stamp. Then, I used Distress Inks in Candied Apple, Blueprint Sketch, and Wilted Violet to blend my background, which created a neat effect where the embossing powder resisted. I used some Archival Ink to stamp on some stamps and added some CTMH woodgrain washi tape.

I added a couple more stamps and some hearts which I cut with my Cricut, embossed with my Cuttlebug, sponged Distress Ink on and stamped a script stamp on. The Ground Espresso Distress Ink was great to sponge around the outside edges of my hearts and tag.

 Here's a couple close ups of the tag. I framed a butterfly with a wood piece and added some sequins from the 28 Lilac Lane collection.


Now, for the second side! I coloured the seam binding ribbon with Distress Inks misted with water. I just love this effect.

Since the dragonflies were already stamped with Distress Paint and dry, I smooshed Lucky Clover and Carved Pumpkin Distress Inks on my craft mat and added some water before laying the tag in it and drying several times in between to add some colour, using techniques from the Wrinkle Free Distress Technique. Then I used some Archival Ink to add some stamped images.

I added a little more colour around the edges with Ground Espresso Distress Ink and painted the butterflies using the Izink inks - love these! I even used the paint brush to flick on some extra paint and then misted with the Tim Holtz Mica Spray - so pretty!

Here, you can see where I've glued on some pearls and beads to accent the dragonflies and butterflies. These are also from the 28 Lilac Lane Collection. You can also see the pretty shimmer from that Mica spray.

You can check out another tag I created using the Art Foamies here! Thanks so much for stopping by today! I hope you have an awesome week!

Linked to:
Creative Chemistry 101 - Week 1 challenge -Use 4 or more Distress Ink Colours


Sunday, June 5, 2016

Stitched With Love!

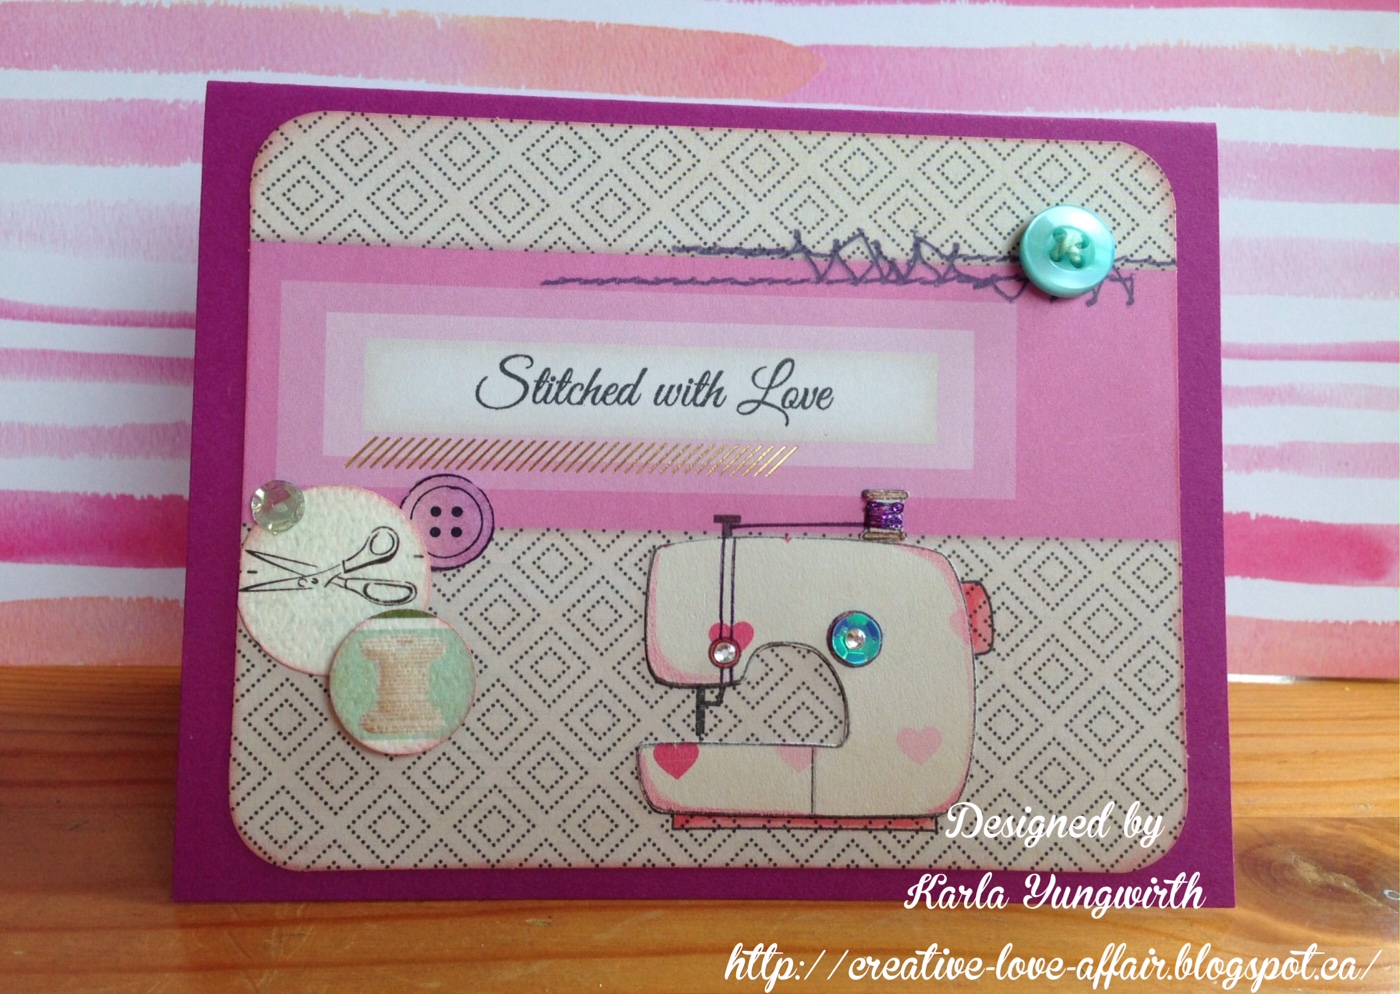
Hi friends! I hope you all enjoyed a relaxing weekend with a bit of crafty time for yourself. I'm sharing a card with you today using the Pretty Cute Stamps Sew Amazing stamp set. I love to sew, but don't do it often enough right now - however, this stamp set lets me have fun with all the stitchy elements and play with paper too!

 I started off by cutting a Project Life card down a bit. It already had this fun, funky stitching printed right on it! Perfect! I used some Distress Ink to sponge some colour around the edge before adding it to a folded card. I love the Stitched With Love sentiment from the stamp set and stamped it directly onto the PL card. I used my circle punches to punch out a few fun patterned paper items and added a stamped button from the set.


I stamped the fun sewing machine in the set directly onto my background as well as on a piece of Maggie Holmes patterned paper. Then, I fussy cut around the main part of the patterned paper stamped image before adding it to my background. A bit of coloured pencil highlighted the edges. You can see that I added some glittery purple thread onto my spool before attaching it!

Inside, I used the piece of the PL card I cut from the front and stamped the Just For You sentiment, also in the set. I added some zigzag and running stitches stamps and some stamped buttons that I used Distress Inks to colour. I wrapped some more shiny purple thread directly onto my cut out spool before adding it inside the card as well.

A few sequins and a pretty button from the 28 Lilac Lane collection and a couple rhinestones from my stash, add a bit of bling!

Here's a look at this awesome stamp set:
Sew Amazing
 Thanks so much for stopping by today! Hope you have a wonderful week :)


Thursday, June 2, 2016

Loads Of Fun!

Well, it's hard to believe another week has passed already, and we are now into June! It always seems like the last month of school is so busy wrapping up all the kids' activities, so it was nice to take a little break to do laundry.... or rather make a card with this cute Lawn Fawn Loads Of Fun stamp set ;)

I used alcohol markers to colour in the washing machine and stamped the cute little clothing items on some patterned paper before throwing them in the wash. I paper pieced the laundry in the basket and added some highlights with marker. 


I love the adorable faces in the stamp set! So cute!

Here's the inside. This sentiment is awesome! 

Thanks for joining me today! I hope you have a great weekend - with not too much real laundry to do!