Sunday, November 29, 2015

One Sheet Projects with Pretty Cute Stamps!

I sure hope all of my US friends had a wonderful Thanksgiving weekend! We put up our tree and decorated for Christmas on Friday while we listened to Christmas music and had some very yummy snacks!

I'm sharing these cute cards and boxes today on the Pretty Cute Stamps blog, and I wanted to let you know how I made them. I've been using a lot of the Heidi Swapp Believe paper this year and have also been enjoying the One Sheet Wonder video instructions by Angie at My Chic'n Scratch. I love that you can take one sheet of patterned paper and some cardstock to create all these projects!!

I used the sentiments from the Nativity 1 and Nativity 2 stamp sets, as well as one on the inside of my card (bottom photo) from the Oh, Christmas Tree set, by Pretty Cute Stamps as my focal images. They are beautiful sentiments and are printed in wonderful fonts. I absolutely love these adorable images, but I really wanted to focus on these amazing sentiments this time! I dug through my stash of diecuts and even used my Cricut to cut some circles with coordinating scalloped edge frames to stamp on. 

I love these cute little folded bags! The video link above shows you how to cut and fold all the pieces using just a scoring board and cutter. I love how CAS the cards are and even though I usually struggle with that style of card I am really happy with how they turned out. I think the sentiments really show up using these layouts. Below each card (bottom row) I've shown the coordinating inside sentiment.

Thanks so much for joining me today! Don't forget to check out our Gift Giving Challenge at the Pretty Cute Stamps blog this month and you could win yourself a fabulous gift certificate!

Linked to:
CHNC Patterned Paper Challenge - November Link Up
DL Art - Thankful Thursday November Challenge - AG
Crafty Hazelnuts Christmas Challenge - #257 - Use A diecut/punch


Fresh Powder Layout!

Well, the snow is here in Calgary and so is the Whiteout BoBunny Collection! So, I've been in the mood to scrap my winter pics. The sketch from Stuck?! Sketches was perfect to combine with my BoBunny paper and this sweet photo of my daughter taking her first ski lesson.

Even though the photo of my daughter wasn't the best quality I wanted to scrap it since it was a really fun day for her. I added some coordinating patterned papers from my stash to frame the photo and to use for this cute snowflake frame diecut that I cut with my Cricut Explore. I love the circle element on the sketch (below) but I wanted the paper to really shine through so I love the way this frame works, serving both purposes.


I cut the mug and ticket stubs out from the Whiteout paper and used a paper diecut embellishment from BoBunny for my title. I added the gems on the snowflake frame and the gold brads to match the sparkly paper.

I love the glitter on this paper!!

How cute is this mug?!!

Thanks so much for joining me today! I had so much fun creating this layout and I'm always reminded how much I love scrapbooking when I sit down to create. I hope you all have a lovely week!

Linked to;
Stuck?! Sketches - Nov Sketch

PDE Linky Party - Always AG!


Simon Says Stamp Wednesday Challenge - AG
Little Scrap Pieces - Show It Off Saturday


Wednesday, November 25, 2015

Robotastic Birthday!

Even though I'm busy making lots of Christmas cards right now I do have several birthday cards to make this time of year! My nephew is turning 8 and I thought this Robot birthday card would be perfect to send to him using some Pretty Cute Stamps (see links below).

I used a gear diecut from Cricut Design Space and popped it up with foam dots over my stamped Robot image, which I coloured in with Prismacolor Markers.


I even decorated the inside and envelope -

Here's a look at these cute stamp sets I used!
Botday
 Gears To You
Thanks so much for stopping by today! I hope you're enjoying your week and working on some fun crafty projects!

Linked to:
Mojo Monday - Sketch 425


CHNC Patterned Paper Challenge - November Link Up
DL Art - Thankful Thursday November Challenge - AG


Tuesday, November 24, 2015

Gingerbread Christmas Cards!

Well, I think it's that time! Christmas is really not that far away, so I want to get my Christmas cards done in the next couple weeks so I can use December to make some crafts and gifts and do lots of holiday activities with the kids.

I was inspired by some cards Angie at My Chic'n Scratch made using one sheet of patterned paper to create four cards and a cute little gift box! You add in your own cardstock for the base of the cards. I created a different focal image on the front of mine, but used her directions to make the bases for my cards and box.

After I covered the card bases with Believe paper from Heidi Swapp I used my Cricut Explore to cut these sweet gingerbread cutouts from the Cricut Gingerbread cartridge. I used coloured pencils to colour in some of the areas of my cookies and then used Glossy Accents to add a shine over top. Some Stickles on my wreath and trees add some more shimmer!

I used the inner cuts from the tree to create a tag cut from kraft cardstock. A couple stripes of this fun Christmas paper and a bit of candy cane twine give it a festive look tied to this quick and easy box.


Here's a close up of all four cards:

Thanks so much for joining me today! Don't forget to stop by the Scrapendipity blog to see what's happening over there!

Linked to:
Die Cuttin' Divas - #243 Tag, Bag or Box (my tag with diecut Christmas Tree)
CHNC Patterned Paper Challenge - November Link Up
DL Art - Thankful Thursday November Challenge - AG


Monday, November 23, 2015

FCCB #265 - Thanksgiving or Thank You!

Welcome to another Challenge Me Monday...


Sponsored by:
Miss Kate Cuttables
 A $25 Credit Voucher and ONLY good for digital download files.

To qualify for the prize, be sure to use at least 1 Cricut cut on your project and if it's not obvious, let us know what cartridge you used. If you use a Cricut Explore machine, at least one cut must be from the Cricut catalog of images.

And, if you submit a project in our challenge that isn't a card, you will get two entries for a chance to win the prize instead of one!

For my project this week I created two mini Thank You cards using the Cricut Starter Projects cartridge in Design Space and the Butterflies from Miss Kate Cuttables. You could size these cards to any size you like!

After I cut the butterflies I used my Prismacolor Markers to colour them in. The ones on the cards have two layers plus the body, and the ones on the envelope have only one layer along with the body. There are lots of different combinations you could make with this file! I added Stickles on the envelope butterflies to add some fun shimmer.


Inside, I added a second generation stamp using the Tim Holtz buttefly stamp so that I could still easily write a thank you note over the image.

Thanks so much for stopping by today! Be sure to check out what all the other Design Team members have come up with for this challenge on the FCCB blog and enter your own for a chance to win an awesome prize from Miss Kate Cuttables!

Linked to:
Little Scrap Pieces - Show It Off Saturday
CHNC Patterned Paper Challenge - November Link Up
DL Art - Thankful Thursday November Challenge - AG


Friday, November 20, 2015

Pretty Cute Stamps November Challenge - Gift Giving!

So glad you're stopping by today to check out the November challenge at the Pretty Cute Stamps blog! This month our theme is Gift Giving. I'm really getting into the Christmas spirit since we had our first real snowfall of the season on Tuesday! I'm already humming Christmas tunes! 'Happy Holidays....'!!


This fun red striped paper in the Shimelle True Stories paper pack reminded me of candy canes so I decided to create this cute Christmas card using the Cool Chick, Oh, Christmas Tree, and Christmas Cheer stamp sets. I heat embossed some pretty silver snowflakes on the blue sky paper also in the pack, and I layered on my stamped images along with a hand cut snow bank.

I paper pieced the penguin's little hat and scarf as well as the Christmas tree with more papers from the True Stories collection and coloured with Prismacolor Markers. I used some glittery embossing powder on the edges of the tree to add a snowy feel!

Inside I used snowflakes and a sentiment from the Christmas Cheer set:

For my card I used these awesome stamp sets:
Cool Chick

And now I have one more Christmas card done! Thanks so much for stopping by :) Be sure to head over to the Pretty Cute Stamps blog to see what all the other Design Team members have come up with for this challenge - and enter your own for a chance to win an awesome PCS gift certificate!

Linked to:
Crafty Hazelnuts Christmas Challenge Extra - November Linkup
Crafty Hazelnuts Patterned Paper - November Challenge
DL Art - Thankful Thursday November Linky Challenge
613 Avenue Create - AG
Simon Says Wednesday Challenge - Christmas
Cut It Up Challenge Blog- Inspired by a book, movie or song (Song: Happy Holidays by Andy Williams!)

PDE Linky Challenge - Anything Goes!


Thursday, November 19, 2015

PDE Friday Linky Party - Coffee Tag!

If you haven't heard the news, I'm on the PDE Linky Party Design Team! Woo Hoo! It's a fun place you can link up your Anything Goes projects every week!! This is my first official post for them and I'd love it for you to check out the blog and their fun Facebook page!


This week on the PDE blog I'm featuring this fun vintage coffee tag using Shimelle's True Stories paper collection!

First I layered the grey coffee background paper over a Ranger manila tag and inked the edges with, of course, Ground Espresso Distress Ink. I added a CTMH coffee stain stamp, some mist splatters and rub on sequins to my background before I layered on an #ineedcoffee diecut by Wilna Furstenberg, which I watercoloured with Dylusions Spray Mists and Perfect Pearls. For my ribbon I used a couple different colours of Distress Stains on some seam binding ribbon. I love the way it blends together after a quick spritz with water!

The fun Polaroids were cut from the True Stories paper pack as well. I inked around the edges and stamped a Lawn Fawn sentiment on one, embossing with some clear shimmery embossing powder, and on the other I used Glossy Accents to add detail to the sweet little cup.

The coffee cup was cut from a 12x12 sheet of patterned paper in this collection - I love these colours!! I cut another layer of the coffee sleeve and lid and popped them up with foam dots to give dimension. Now I'm totally craving another cup of coffee!

Thanks so much for joining me today! I hope your weekend is going to be full of crafting and things that make you happy :) Please stop over to the PDE Blog and check out what the other Designers are sharing, as well as adding your own Anything Goes project!

Linked to:
Cookin & Craftin- Thursday Linky Party
DL Art - Thankful Thursday November Linky Challenge


Tuesday, November 17, 2015

Fall Diecut Leaf Card!

A few weeks ago we made a beautiful leaf card at the Scrapendipity Make 'n Take with Holly for Thanksgiving. We started off by using Distress Inks to sponge fall colours on a piece of white cardstock and then diecut a leaf from the center. We went on to create a lovely card, and I brought home the negative cut to play with.

We were having an extra guest for dinner (Canadian Thanksgiving is in October), so I needed one extra card! I put my card together by laying down a piece of dark script Prima cardstock on a green card base and then layered the diecut leaf piece on top. I stamped a Fall sentiment from the Harvest Happiness stamp set by Pretty Cute Stamps with Jumbo Java Versa Magic Ink on the front. The Versa Magic is such a nice stamping ink! And I love the way the Distress Ink leaves a shadowed area around the edges of my cardstock. 


To coordinate with our Thanksgiving celebration, I stamped an envelope with the Thanksgiving Eats stamp set by Pretty Cute Stamps and used Prismacolor coloured pencils to colour in my pumpkin. This sentiment on the front is one of my fav's!!

This was a quick and easy card and made our guest very happy! Thanks so much for joining me today. I hope all my US friends enjoy a wonderful Thanksgiving coming up very soon!

Linked to-
Use Your Scraps - #200 Celebrate
Little Scrap Pieces - Show It Off Saturday
Pile It On - #95 Celebration/Holiday
Die Cuttin' Divas - #242 Thanksgiving


Sunday, November 15, 2015

Fall Step Cards!

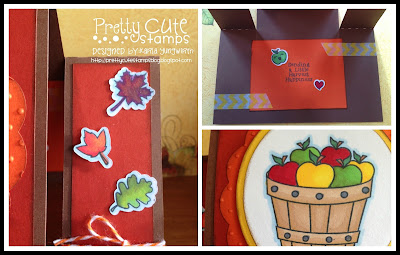
I'm sharing these fun step cards over at the Pretty Cute Stamps blog today featuring the Harvest Happiness and Bushels Of Fun stamp sets!

I used my Cricut Explore to cut the Center Panel Step Card cutting file from the Pretty Paper Pretty Ribbons store for my first card. After I cut the coordinating SVG files, available at the Pretty Cute Stamps store, I stamped the yummy apple pie images from the Bushels Of Fun set and coloured them with Prismacolor Markers. I love all the sweet sentiments included with these images! The fall leaves are from the Harvest Happiness set and went along with my fall theme!


Here are a couple close ups and the inside where I added a couple more stamped images and another sentiment. 

 Bushels Of Fun 

For my second card I used the Side Step Card cutting file, from PPPR as well, along with the Harvest Happiness stamp set. I love the way you can layer this set to create a scene! I heat embossed the greeting on the bottom layer of my step in white and added all my stamps, popping up the hay in front of the cute scarecrow.

Here are some close ups of this card:

Harvest Happiness 
Thanks so much for joining me today, and I hope you have an awesome week!! Don't forget to check out the awesome New Release stamps in the Pretty Cute Stamps store from last week!

Linked to:
PDE Linky Party - AG!